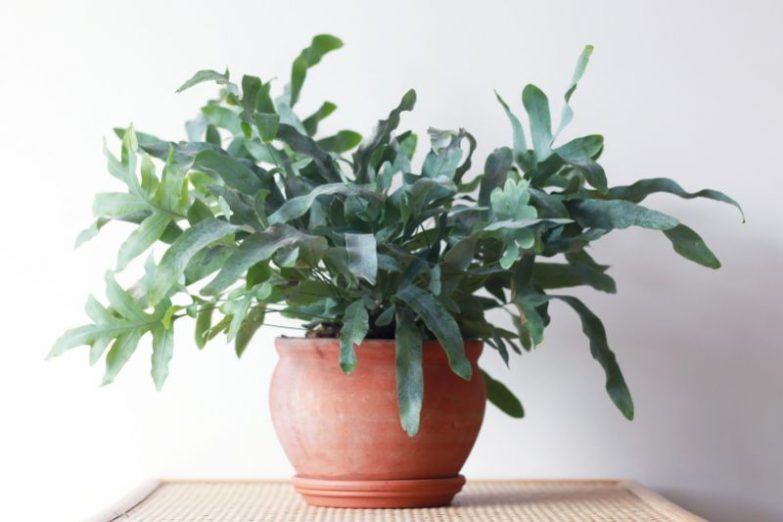
The Blue Star Fern (Phlebodium aureum) is gaining popularity for its bold, blue-green foliage, and because it’s easier to keep than many of its fussy cousins. Besides making a striking contrast with other houseplants, it’s a promising choice for anyone who hasn’t had luck with ferns and wants to try again. Let’s examine everything you need to know about Blue Star Fern Care to keep your plant healthy and looking great.
For good Blue Star Fern care, provide high humidity, bright indirect light, and plant in well-aerated, fast-draining soil. Water to maintain lightly moist soil, provide temperatures of 57ºF (14ºC) to 81°F (27°C), and fertilize every 2-3 months while actively growing.
Blue Star Fern Overview
The Blue Star Fern (Phlebodium aureum) isn’t a typical finicky fern. It’s actually an epiphyte that naturally lives in a variety of arboreal and terrestrial settings.
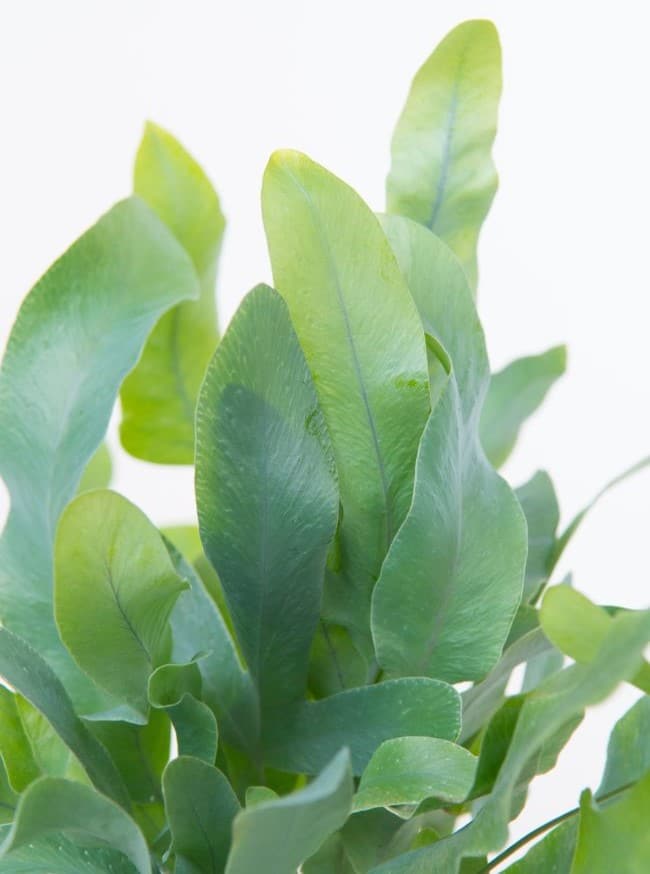
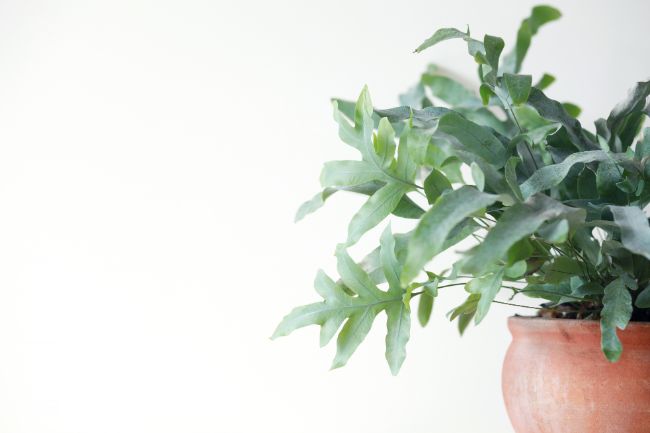
Its thin leaves are textured and shaped like fat fingers … their standout feature is their attractive and soothing blue-green color. Another highlight is the plant’s golden-brown, furry “creeping rhizomes” which provide contrasting color as they cover the soil and spill over the pot’s rim.
These features and its wide-ranging nature have given the Blue Star Fern an abundance of common names:
- Golden Serpent Fern
- Gold Foot Fern
- Cabbage Palm Fern
- Golden Polybody
- Palm Boot Fern
- Bear’s Paw Fern
The plant’s special coloration contrasts well with other houseplants, but it also stands out by itself in a pot or hanging basket. The fronds can grow from one to two feet long or more; they move actively in a breeze on thin, delicate stems.
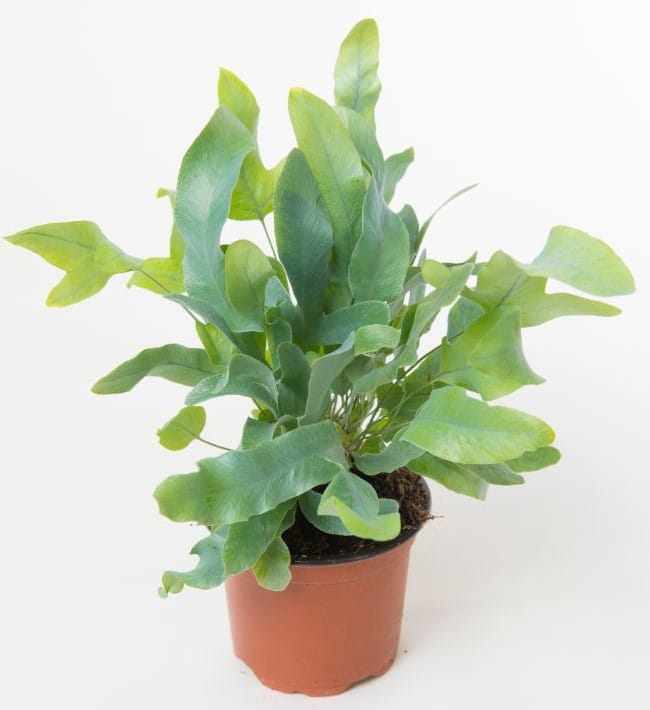
Blue Star Ferns make excellent terrarium plants when young and small. They can grow to three feet high outside but typically stay smaller in pots.
This fern has a certain ruggedness that many of its family lacks. It tends to grow slowly with cycles of higher growth between periods of less activity. The plant thrives outdoors in a warm climate, but it also lives happily inside as a year-round evergreen.
Blue Star Fern Care Summary
| Scientific Name | Phlebodium aureum |
| Origin | Central And South America |
| Light Requirements | Bright, indirect light. Can adapt to lower lighting, but won’t tolerate direct sunlight. |
| Watering | Maintain consistently moist soil by watering thoroughly once the surface of the soil is dry. Ensure good drainage. |
| Soil | An epiphytic orchid mix is ideal but Blue Star Ferns can tolerate any well-draining mix as long as care is taken to avoid overwatering. |
| Temperature | 57ºF (14ºC) to 81°F (27°C). Not cold hardy. |
| Fertilizer | Low fertilizer requirements. Fertilize lightly every 2-3 months with a balanced fertilizer while actively growing. Less is more. |
| Humidity | Average to high humidity. More tolerant of lower humidity than most other indoor ferns. |
| Flowering | Non-flowering. Produces two rows of bright orange spores on the undersides of the fronds. |
| Pruning | Prune to maintain size and remove damaged or dead leaves. |
| Propagation | Best propagated by division of the rhizome. It can also be grown from spores. |
| Re-Potting | Quite sensitive to repotting, so only repot once showing signs of being rootbound. |
| Diseases and Pests | Less susceptible to pests than most other ferns. Diseases are most commonly due to overwatering. |
| Toxicity | Blue Star Ferns are non-toxic to humans and animals. |
| Where To Buy | Buy Blue Star Fern online at Etsy (I buy most of my houseplants from Etsy). |
Blue Star Fern Light Requirements
Blue Star Ferns can adapt to lesser light, but they prefer bright, indirect light. They need protection from scorching in direct sun yet tolerate more intensity than many other ferns.
The foliage can signal whether the plant is getting the right amount of light: too much causes their glaucous color to fade; too little light will inhibit growth.
Being close to a north-facing window is usually ideal, but they can do well in any bright exposure if you keep them out of direct sunlight. Generally, they do best within about three feet of a window. Sheer curtains can be too protective; gentle direct morning or late afternoon rays are fine.
Watering
The Blue Star Fern has a limited tolerance for dry soil. As a tree-living epiphyte, it appreciates steady, slight moisture without overwatering.
The main thing, however, is to avoid is soggy soil. The rhizome is especially vulnerable to rotting in wet conditions.
Here are some watering tips:
- Wait until the soil surface is dry to the touch before rewatering. You can let the top inch dry out, but no more.
- When it’s time to water, do it thoroughly. Saturate the soil and then let the excess drain out.
- Try not to wet the leaves, and avoid leaving water in the crown. Some growers water the sides of the pot – but this can be messy indoors. If the soil drains well, you can set the pot in a basinful of water until the medium is thoroughly soaked.
- Regardless of the method you use, let the pot drain thoroughly. If you have a cache tray, check it after the soil has drained and empty any remainder.
- A Blue Star Fern is sensitive to salts and other residues left by fertilizer, minerals and chemicals like chloramine. Consider using filtered or distilled water.
- Use room temperature water to avoid chilling the roots.
- Flush the soil with each watering to avoid a buildup of evaporated residue. Simply let extra water run through the soil and out the drainage holes. Drain well.
Read my guide to watering houseplants for more tips for how to identify when your houseplants need to be watered.
Choosing Soil For Blue Star Ferns
The right soil is key to properly watering your Blue Star. Their mix needs to drain quickly and stay well aerated even after a through soaking.
An Orchid mix is recommended for this fellow epiphyte. If necessary, the plant can accept a porous potting mix that drains quickly and maintains aeration.
Other considerations are pH and water retention. Your Blue Star Fern likes slightly acidic soil that retains moisture without becoming waterlogged. Peat can boost both of these factors, but use it in moderation as it holds too much water if used alone.
Note – Be careful to thoroughly hydrate the soil if you’re using peat: it can repel water if it gets too dry.
Should You Repot A Blue Star Fern After Purchase?
If you bring home a thriving Blue Star Fern planted in potting soil, it’s usually best to leave things as they are. Its roots have adapted to that soil.
It can be tempting to repot using orchid mix; but, unless the soil is much too heavy, it’s probably unwise.
Here are some considerations:
- Blue Star Ferns can thrive in well-draining potting soil if they have adapted to it.
- A nursery professional usually knows which medium works well for their plant.
- In a dry climate, a regular potting mix can be easier to keep properly hydrated.
- Even if the soil is working well currently, a mix rich in organic material can become compacted through decomposition over time. Reevaluate the soil periodically.
Humidity
The fact this fern likes humidity isn’t a big surprise … happily, high humidity isn’t essential to provide good Blue Star Fern care, as it can adapt to average indoor humidity too.
Proper watering helps make up the difference if the air moisture is less than an ideal 40% or more. Misting won’t make much difference, but it’s probably not necessary to resort to a room humidifier, either.
Here are simple ways to boost humidity: (read this article for even more info about increasing humidity for your plants).
Grouping plants: Putting plants together raises their humidity slightly through mutual transpiration. It’s better to group your Blue Star Fern with other moisture-loving plants for maximum effect.
Water Trays: A tray filled with pebbles and water is an easy, low-tech means to modestly increase humidity. You can set the plant’s container on the tray as long as the pebbles raise its bottom above the waterline. Putting trays nearby helps, too.
Soil Reservoirs: Place seashells on the soil surface and fill them when you water. This trick raises humidity a small amount and isn’t as visually distracting as a water tray.
Temperature Requirements
The Blue Star Fern is a warm-weather plant that doesn’t tolerate frost and goes dormant if the thermometer dips. The plant is potentially deciduous, so it can shed its leaves until warm temperatures return – something you don’t want a decorative houseplant to do!
The plant can overwinter outdoors in tropical or subtropical climates in USDA Zones 9 and above. Indoors, it stays green year-round in its preferred range of 57ºF (14ºC) to 81°F (27°C).
Fertilizing Blue Star Ferns
A Blue Star Fern is a light feeder: it’s much easier to overfeed than under-nourish. The root system is sensitive, so use a mild, well-diluted formula.
Either a synthetic or organic form may be used, but dilute the fertilizer to half or even a quarter of the recommended dosage. A balanced blend like 10-10-10 or one with a slightly higher nitrogen ratio works well.
Fish emulsion is a recommended fertilizer that is gentle and offers the right nutrient balance, but it has one drawback: it smells. It’s not an odor that goes well indoors. Fortunately, it does dissipate quickly if you dilute it in water and only apply a minimal amount.
Here are points to remember:
- The time to fertilize is during the warm season when the plant healthy and growing well … not when its growth is dormant or languishing.
- Never try to fertilize a sick plant back to health. It’s more likely to be shocked than stimulated.
- In general, don’t fertilize over the winter months … but an indoor plant that stays evergreen all year can be carefully fertilized as long as it is growing well.
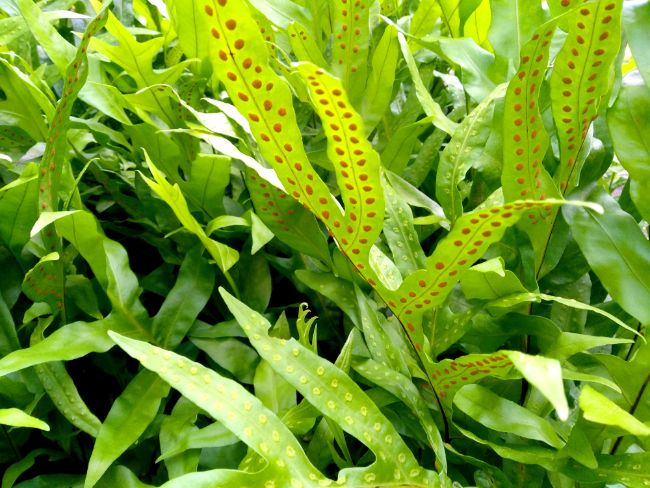
Non-Flowering
Blue Star Ferns are all about the leaves. Its blue-green foliage is great as supporting backdrop to a flowering scene, but the plant itself doesn’t produce blossoms.
The closest it gets to blooming is two rows of bright-orange, spore-producing dots on the underside of its fronds. Interesting, but more a science project than a festive display.
Pruning On Demand
Pruning is an essential part of Blue Star Fern Care. Removing errant stems and dead or damaged foliage can conserve the plant’s energy for new growth, and help to prevent pests and diseases. Blue Star Ferns can’t be pruned to promote specific growth, but trimming can maintain a certain size and shape.
Remove dead foliage that would otherwise attract pests and disease. Damaged leaves don’t repair themselves, so be vigilant and remove foliage in decline.
Pruning is done by snipping the thin stems. Make sure your cutting tools are sterile – wiping them with isopropyl (rubbing) alcohol does the job. Read my guide to pruning houseplants here.
Repotting Your Blue Star Fern
Repotting is something of an ordeal for a Blue Star Fern, so don’t put the plant through the event until it’s necessary. Every two years is typical, and a healthy specimen can often go longer.
You should only repot if the plant has outgrown its space. It’s not unusual for the rhizomes to climb over the container’s rim – that’s why they’re called creeping rhizomes, after all. By itself, such rhizome intrusion isn’t a sign the plant needs repotting.
Here are considerations to keep in mind:
- Repot in the springtime so the plant has time to recover. You can repot a thriving indoor houseplant anytime, but they still do respond to longer days and the higher moisture of the growing season.
- One of the signs repotting may be necessary is yellowing leaves; another is the need to rewater every day or two.
- Check the roots by gently removing the plant from its container … if the soil has been mostly replaced, it’s time for larger quarters.
- Reminder: As a rule, don’t replace the soil your Blue Fern arrives in. If the plant has adapted to soil, putting it in a lighter mix can shock its root system.
- Choose a shallow pot with adequate drainage.
- Increase the pot size by only an inch or two wider than the former container.
- Never bury the fuzzy rhizomes in soil!
Propagation
The common way to propagate a Blue Star Fern is by dividing the rhizome. You can grow new plants from spores, but it’s a much slower process.
Here are the steps of rhizome division:
- Prepare a planting container using an Orchid mix or another well-draining medium with a lot of aeration.
- Gently tease out the roots and choose a healthy rhizome to propagate.
- It’s best to cut through a thin area on the rhizome. You can take multiple sections, but make sure each portion has a sufficient number of leaves and roots to support it.
- Transfer each rhizome section to the planting mix. Press it into the medium, but don’t cover it. The rhizomes should have good contact with the soil while sitting on top of it.
- Water every two or three days, keeping the soil slightly moist. Be careful not to overwater: the rhizome is prone to rotting if kept too damp.
- New growth should appear in about a month. Give them the care you give the mother plant.
Growing Spores
Mother Nature’s way is much slower, but it can be done.
- Collect the spores when dry. One easy method is to place a frond with spores in a paper bag; once dry, shake the bag to gather the spores.
- The spores should be sprinkled on top of the planting mix. Cover with clear plastic and keep the soil moist by misting it every other day or so. The temperature should be above 64°F (17ºC).
- Germination should begin after two months – though it may take up to five.
Tips For Blue Star Fern Care
- Don’t worry about occasional brown tips and other minor imperfections. They can happen even if conditions are ideal.
- Ferns are generally a bit fragile and are easily shocked from rough treatment or repotting. The plant may lose some fronds and will need time to recover.
- If the plant does experience shock, make sure it’s in a warm, humid spot with good light. It may be helpful to tent the plant in clear plastic to raise humidity during convalescence. Once you see new growth, gradually acclimate the plant to normal conditions.
- Giving your Blue Star adequate light is the best way to maximize growth – they cannot be forced into growing faster by repotting or extra fertilizer
- Look to the heart of the plant for signs of new production.
- Good air circulation is important.
- If your plant’s foliage is turning purple or brown, it may be caused by wet rhizomes or water in the crown.
- Brown tips on fronds are often caused by tap water or soil loaded with salts, minerals, and other chemicals (read more about water quality for houseplants here).
- Browning that affects more than just the tips can be related to insufficient humidity or soil moisture.
Toxicity
You don’t have to worry about children or pets getting into these plants. Blue Star Ferns are non-toxic. The rhizomes of this genus are even used for medicinal purposes.
Blue Star Fern Varieties
Ferns are one of the oldest plant groups – older than dinosaurs or even flowers – but the Blue Star Fern has recently evolved, geologically speaking. They are part of the small Phlebodium genus.
Recent reclassification of the family can make the nomenclature confusing. Two similar species are sometime mistaken for the Blue Star Fern (Phlebodium aureum):
- Phlebodium pseudoaureum (Blue Rabbit’s Foot Fern, Virginia Blue) – This plant, also known as Phlebodium areolatum, has thinner and less rounded leaves than the Blue Star, but the care is the same.
- Phlebodium decumanum – This tropical variety is commercially farmed for a nutritional extract said to reduce chronic fatigue and aid muscle recovery. Though sometimes presented as a ruffled variant of the Blue Star, it’s less tolerant of cool conditions.
There are also some hybrid Phlebodium variants on the market which may (or may not) vary slightly from the Blue Star Fern. One example is Phlebodium aureum ‘Mandaianum’ or Crested Bear’s Paw Fern.
All Phlebodiums require similar care.
Pests And Diseases
Blue Star Fern care isn’t completely free from having to deal with pests or disease, but it is less susceptible than many ferns to the usual horde of aphids, spider mites, thrips, scale, and mealybugs.
The main problem is that invaders can bed down in the fuzzy coating of a rhizome for protection. Gentle remedies like insecticidal soap and light horticultural oils can be effective, but they must come into contact with the pests.
Note: The presence of white spots on the foliage and rhizomes is common. Don’t worry unless they are accompanied by signs of infestation.
Keep your Blue Star well away from any infested plants. If you run into pest trouble, isolate the plant to keep it from spreading further.
You will need to repeat treatment every four to six days until the pests are gone. Harsher pesticides may be a last resort. If your Blue Star Fern has pests, read this article to identify the bug and get further information about how to get rid of and prevent them.
Most Diseases Are Moisture-related
The common diseases your Blue Star Fern faces are triggered by moisture, which is another reason overwatering is a concern. For these diseases, prevention is the best – and sometimes only – cure.
Here are the most common:
Root Rot – This is by far the most common serious affliction, and it’s only a few short hours of soggy soil away. It’s more problematic with heavy soil.
Southern Blight – This fatal root fungus likes the warm, moist conditions your Blue Star favors. There are no effective fungicides available to home gardeners: the best prevention is sanitary routines like sterilizing your tools and using sterile potting media.
Mildews – Rust and Powdery Mildew are common and spurred on by moisture. The best prevention is to keep the leaves dry and maintain healthy air circulation.