Wrinkled orchid leaves are usually a sign that your orchid is struggling and needs a bit of attention to get it back to good health. But what are the actual causes of wrinkled orchid leaves and how do you fix them? This article will walk you through all the main causes and tell you how to get your orchid thriving again.
Why are the leaves on my orchid wrinkled? The most common causes of wrinkled orchid leaves are lack of water, too much water, orchid diseases and low humidity levels. A good assessment of the growing conditions of the orchid should be able to identify the cause and help you to fix the problem.
Underwatering Your Orchid
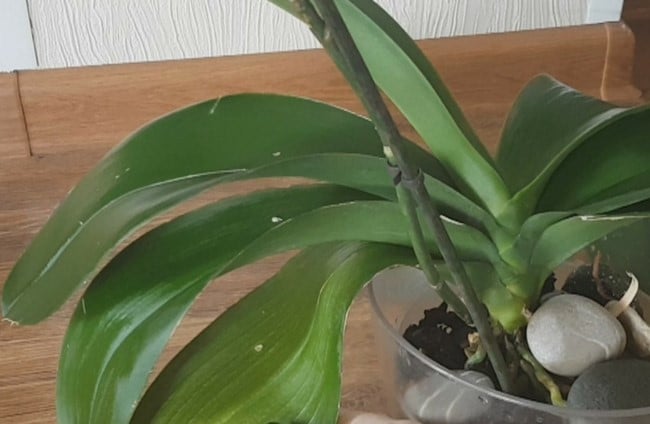
This is probably the most obvious reason why an orchid can have wrinkled leaves. If an orchid receives insufficient water, the leaves will shrink and shrivel and have a flaccid, wrinkled appearance.
If you inspect the rest of the plant, you should find dry potting material and dry, shriveled roots.
Solution – The solution to this problem is to water the plant immediately and to monitor the condition of the leaves, roots and potting material, to ensure that they are watered as soon as they dry out.
Monitor the potting medium and condition of the roots to know when it is best to water your orchid. You should water your orchid once the potting medium feels dry to the touch, but not before. Water your orchids when they need it, and not on any fixed schedule.
I normally feel the potting medium, then lift the pot up to take a look at the roots at the base of the pot. If they look or feel fairly dry, I water the orchid. If not, I check back tomorrow. If you see any wilting or wrinkled leaves before watering, this means the plant is already suffering the effects of insufficient water.
Check out my article about how to water phalaenopsis orchids, for more information about how to correctly water the most popular indoor orchid species.
Overwatering Your Orchid
Although it seems confusing at first, overwatering your orchid can also cause wrinkled, shriveled leaves. However, this is due to an entirely different cause.
If you overwater an orchid, it makes them susceptible to root rot, which will kill off some or all of the roots. With dead roots, the orchid plant will be unable to absorb water through the roots. As a result, the orchid leaves, stems and flowers will be deficient in water, even though the soil is waterlogged.
Solution – There are two parts to this solution. Prevention and cure. To prevent overwatering your orchid, simply follow the general watering tips highlighted above, taking care only to water your orchid once the potting medium feels dry. Curing the problem is a bigger issue, but I’ll run you through things below.
What To Do If You Overwater An Orchid?
The most important thing is recognition of the problem. If you can identify what the problem is before the orchid suffers too much damage, you can get the plant back on track.
Firstly, check the potting medium and roots. Feel the potting medium to ensure that it is intact and has not broken down too much. If it is breaking down and starting to compact, it may be time to repot your orchid. Examine the roots at the sides and bottom of the pot. If they are green and firm, they are healthy. If they are mushy, brown or black, or are falling apart, there is very likely to be some root root, and these roots need removed to save the plant.
You should gently remove the orchid from the pot, carefully separating the potting medium from around the roots, before inspecting them. All roots affected by root rot need to be removed with a sterile pair of scissors or pruning shears. Even if this will significantly reduce the volume of roots that the plant has, it is the only way to give the orchid a chance of surviving.
Next, repot the orchid in a new pot, in a suitable orchid mix such as pine bark. Only very lightly water the orchid after repotting, and then let it dry fully before watering again. If the orchid survives, breath a sigh of relief and try to follow the general watering tips to avoid a recurrence.
I’ve got an article about repotting orchids which goes into more detail if you want to learn more.
Low Humidity Levels
Very low humidity levels, which are often present in indoor locations where orchids are kept, can also cause wrinkled leaves. The reason for this is that low humidity levels will accelerate the rate of transpiration and water loss of the plant. This will then lead to wrinkled leaves as the plant struggles to maintain sufficient water levels within the plant.
Solution – The solution here is to increase the humidity levels to a more acceptable level for the orchid. Most orchids do best when the humidty levels are between 40-70%. Options to increase humidity levels include putting your orchid on a humidity tray, setting up a humidifier nearby or leaving your orchid next to a group of other houseplants, which will naturally raise the humidity level.
Sometimes, if the leaves of your orchid are particularly dehydrated and wrinkled, you may need to resort to desperate measures. One option that works quite well is to put a polythene bag over the top of your orchid to make a mini-greenhouse effect. This will create a very humid environment and will help the leaves to recover and plump up, if they are not too badly damaged. The only thing to be careful of is that you keep the orchid out of direct sunlight when doing this, to prevent excessive heat build-up for the orchid.
Another thing you may wish to do is to get a humidity meter for your home. I use a combined thermometer and humidity meter at home in the rooms where I keep some of my more sensitive houseplants. This will record both the current, maximum and minimum temperature and humidity levels. It gives me an idea of the current conditions and the variation from day to day. These cost very little and are well worth the price, particularly if you are struggling to keep some of your houseplants in good condition.
Orchid Diseases Causing Wrinkled Leaves
The most common orchid diseases that can lead to wrinkled leaves are root and crown rot. These can be caused by a number of bacteria and fungi, which cause severe damage and death to the affected parts of the plant. The damaged plant is less able to absorb water and transport it to the leaves, so the leaves become water deficient and wrinkled.
As mentioned previously, root rot is often caused by overwatering, which produces ideal conditions for root rot to set in.
Crown rot, on the other hand, is caused by water pooling in the crown of the plant, particularly in single stemmed species such as phalaenopsis and vanda orchids. If water is left in the crown, this produces a perfect breeding ground for the organisms which cause crown and stem rot, leading to rapid blackening of the crown area, and often to death of the plant.
Solution – Avoiding crown rot is fairly simple. Only ever water the roots of your orchid and the potting medium. Avoid getting water on the leaves or in the crown of the plant.
Don’t mist your orchid. If your house has low humidity levels, use a humidity tray or humidifier. Misting can not only increase the risk of stem and crown rot, it can also cause petal blight spots on the orchid blooms.
As mentioned previously, avoid root rot by taking care to water your orchid correctly. Far more orchids die from excessive watering, rather than insufficient water, so err on the side of caution.
Can You Fix Wrinkled Orchid Leaves?
Whether you can fix wrinkled orchid leaves depends on the severity of the damage. The first sign of a problem will be wilting of the leaves, followed by wrinkling, then other signs of damage such as yellowing, discolored patches, brown tips or leaf splitting.
If you catch leaf damage in the early stage, you may be able to detect the problem and put it right, allowing the individual leaves to recover. The solution will depend on the underlying problem, so if you find signs of leaf wrinkling or damage, this should prompt you to assess the plant closely for problems.
If you notice the damage too late, it may not be possible to save the affected foliage. The best thing is to fix the underlying cause and nurse the plant back to health. It’s very tempting to remove damaged leaves, but I wouldn’t rush into doing this, unless there is obvious disease in the leaves.
Removing a partially damaged leaf may make things worse, as the leaf may still be fairly functional, providing the plant with energy, and the wound that will result from removing the leaf could put the orchid at more at risk of disease than if you leave things alone.
If the orchid starts to thrive again, follow the orchid watering tips that I outlined earlier in this article.
Hopefully, this article has been useful in either preventing you running into problems with your orchids or in helping you to fix an existing problem. If you’d like to learn more about orchids, I have a whole series of articles about orchid care. I also have a free orchid care ebook available for download here.