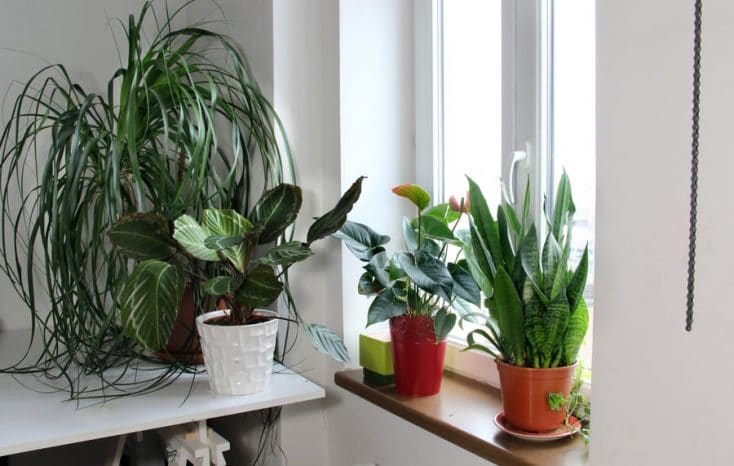
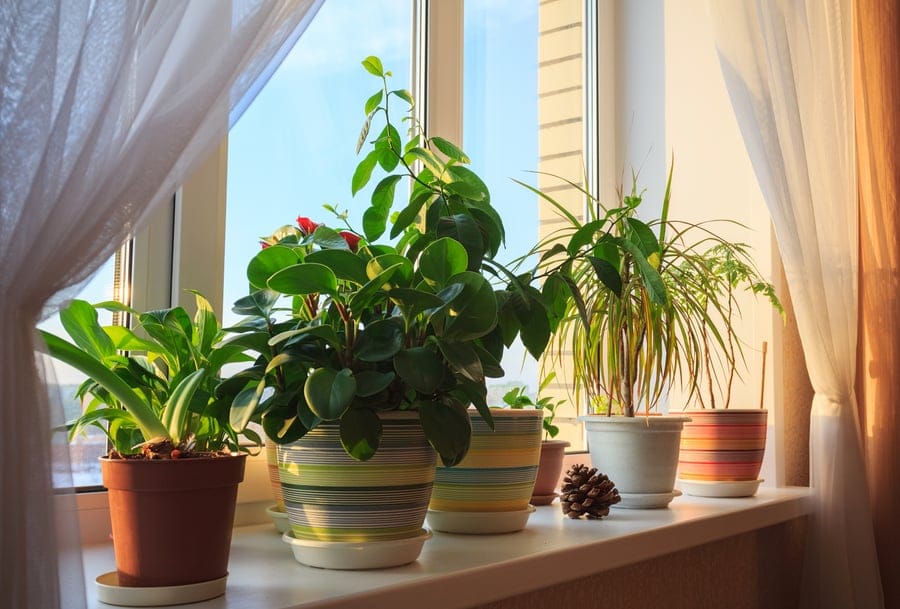
So you’ve made all your vacation plans, and now, it’s time to start packing your bags and making final preparations before heading out. What are you going to do about all your houseplants? Maybe you have a dependable friend or neighbor who can come and water them while you are gone… or maybe you don’t.
This article details a number of clever techniques to water indoor plants while on vacation. We’ll explain how to set up these simple automated watering systems:
- Wick systems
- Drip systems
- Plant baths
- Capillary mats
- Mini greenhouse
- Self-watering pots
- Smart-home automatic systems
You’ll learn about various DIY methods along with a few commercial options. You’ll also gain some great pre-travel planning tips to help ensure you will be meeting your plants’ watering needs while you’re away. And for answers to several related questions about watering houseplants, check out the FAQ section at the end of the article.
So read on, if you want to enjoy your well-deserved time away with the confidence that you’ll be welcomed home by healthy, vibrant houseplants rather than having to face withering, stressed-out plants that are suffering from neglect.
Pre-Travel Planning To Help Houseplants Retain Moisture
A little pre-travel planning will help you feel secure that your indoor houseplants are getting the water they need while you are away. There are a few things you can do to prepare your indoor plants for your absence.
If you are going to be gone less than a week, then all you need to do is water your indoor houseplants well just before leaving. Even your thirstiest plants will be alright for this short period of time as long as they’re not left sitting in a location that’s sunny or hot, where they will take up water faster. Consider temporarily moving these plants to a cool basement or garage – just make sure there is enough light for them there.
Another step you can take to help ensure that your plants don’t dry out while you’re gone is to increase the water retention of your plants’ potting mixture by applying a thin layer of mulch on top of the potting soil.
A wide variety of materials can be used for this purpose, ranging from moss and coconut coir to stones, pebbles, and even marbles or crushed pistachio shells. Spread your mulch evenly over the surface of the soil and don’t allow it to pile up against the stem of the plant, as this can cause them to rot.
If you are planning to be absent for more than a week, then you will need to figure out how to provide water for those indoor plants that need plenty of moisture.
Having Someone Water Your Plants While You Are Away
Back in the olden days, before there were websites informing us how to do everything under the sun, the one tried-and-true way most people knew to make sure their houseplants would survive a vacation was to give your house key to someone you trust and have them come in and water your plants.
Of course, it may still be a decent option. Here are a few tips to help make sure your trusted plant waterer will be able to provide the right amount of water for each plant:
- First, determine and record the current watering needs of each of your plants
- Leave specific instructions on how much and how often to provide water for each plant
- Group your houseplants according to their watering needs
Determining The Watering Needs Of Your Plants
Whether you are having someone come and water your indoor plants or you are planning to depend on one of the self-watering techniques detailed in this article, the first step should be determining the current watering needs of each of your plants.
So, beginning two or three weeks before your departure, write down how often you water each of your houseplants. While doing this, water your plants with a measuring cup so you can keep track of how much water the plant uses each time.
You can then use this information to determine how much water you will need to have available to each plant for the length of time you will be gone.
It’s really best to do this each time you plan on going away rather than using the same information for different trips, because the amount of water your plants use varies according to the time of year and other changing conditions, including how large the plant is and which growth stage it’s in.
But if your life is too hectic and you can’t manage to do this, then be sure to take factors affecting plant watering needs into consideration when deciding on the amount of water to leave in their reservoirs.
Introduction To DIY Automatic Houseplant Watering Systems
Do-it-yourself automatic houseplant watering systems are very simple to construct, and the easiest ones use everyday items that you probably have laying around the house, such as bottles, tubs, cord, and plastic bags.
The basic idea behind these methods is to supply water, little by little, to the potting soil of your plants. With each of these – and this is essential – you must soak the potting soil and allow it to begin draining just before setting up your automated watering system. Then, when you’ve set up your system, it replaces the water as it evaporates and is absorbed by the plant roots,
Note that simply slow-dripping water into a pot is a very different mechanism from allowing the soil to draw water at the same rate that it is drying out, as there is nothing preventing the slow-dripped water from saturating the soil to the point where the excess just drains out the bottom.
If you have too large a supply of water, you risk drowning your plant, whereas a small reservoir of water will empty into the pot too quickly and the excess will drain through, leaving the plant to dry out.
You should do a test run of any automatic houseplant watering system you plan to set up before leaving for your vacation.
Self-Watering Systems Aren’t For All Houseplants
While they work great for plants that like constant moisture in their soil, these automatic watering schemes are not suitable for plants such as succulents and orchids that need their roots to dry out between waterings.
These types of plants can typically go for longer than one week without being watered – especially during their winter resting periods and when their environments are humid or cool – but you may need to have someone come and water them occasionally, if you will be gone for a more extended length of time. You can have them check on your self-watering system reservoirs and refill them, as well.
Simple Wick System
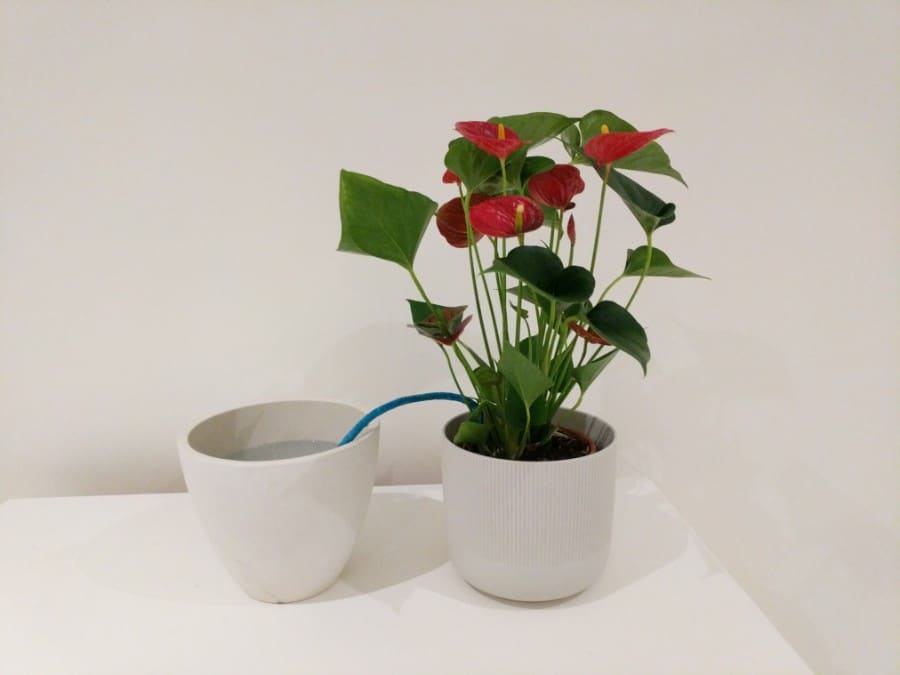
To make a simple wick system that will automatically water a potted plant, all you need is a container for the water and some kind of absorbent material that you can use for a wick.
For the wick, you can use anything from
You may also be able to use a strip of cloth cut from an old T-shirt, microfiber cloth, terrycloth towel, or felt if the water container is set
Basically, cotton is the best material for water absorption, while synthetics are more resistant to rotting and would be a better choice for long time periods. It’s best to test the wick material out to make sure it works well before depending on it to deliver water to your plants while you are gone.
As for the container, you can use just about anything that will hold water, and you can either set up individual systems for each potted plant or use one larger container for multiple plants. You just need to make sure you have sufficient water to last for the duration of your vacation time.
So, what you do is place one end of the wick in the water container, making sure it reaches the bottom so it doesn’t end up drying out as the water gets used up, and poke the other end a couple of inches into the just-watered potting soil, being careful not to disturb the roots.
Plastic Bag Wick System
This is a variation on the simple wick system where you place a re-sealable plastic bag with a string poked through the bottom right in the pot next to each plant.
For this ingenious method of automatically watering your houseplants, you will need to gather a needle, some thread, and a selection of re-sealable plastic bags.
It’s important that you use a very fine needle for this project – ideally, a #10 needle, although anything in the #8-#12 range will work. The reason for this is that you need the thread to wick the water to the plant rather than allowing the water to drip out of the hole you poke through the bag. So the hole has to be very tiny. You can always poke a second thread through the bag, if you need to increase the rate of the water going to the plant, or use multiple bags for one plant.
You will need to test your system to find out the drainage rate, which is determined by the size needle and the type of thread you’ve selected (the above discussion about wicking materials applies to the thread here, as well). This is how you set up a wick system bag:
- Thread about 8 inches (20 centimeters) of thread through your needle
- Tie the ends together in a knot that’s large enough that it won’t easily slip through the hole you are going to make in the bag
- Carefully poke the needle through from the inside near the bottom of the bag
- Cut the thread just above the needle
To test the bag’s drainage rate, fill it with water and prop it on top of a container with the wick dangling down. Leave it for one hour, and then measure how much water dripped into the container.
Using this drainage rate in combination with the information you’ve gathered about your plants’ watering needs, you can determine what size and/or how many bags to place on top of the watered soil next to each plant, making sure the wick is touching the soil but the hole is not.Prop larger bags up with chopsticks or something similar to prevent the upper part from flopping over the edge of the pot as the bag empties.
Easy Drip Systems
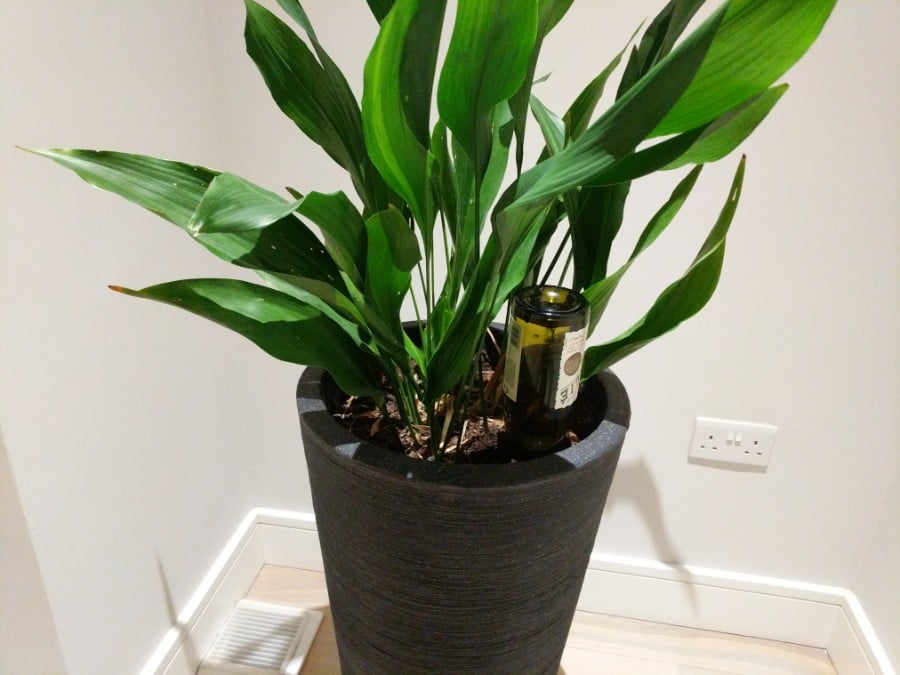
DIY drip systems are also very easy to set up using nothing more than plastic or glass bottles.
For a smaller plant, clean out asmall plastic bottle and poke or drill a fewsmall holeseither at the top of the bottle itself or in the cap. Then fill the bottle with water, put the cap back on, and quickly invert it and plunge it into the just-wateredsoil. Be sure to push it far enough in that the holes are covered by potting mixture.
For plants in larger containers that hold more soil, you can use glass wine bottles or any other kind of bottle you like without having to drill holes. There is a risk that the opening may become clogged by soil, so it’s best to attach a bit of screening to the mouth of the bottle first. You will have to place your thumb over the opening during the inverting and plunging maneuver.
An easier option is to use ceramic or terracotta bottle stakes/spikes, which slowly disperse water from an inverted bottle into potting soil through their porous material.
If you’re not into collecting old bottles or would like to set up a simple automatic drip watering system for the longer term that looks chic in your home, you can try glass watering globes instead.
These work great for a shorter vacation or for regularly monitored ongoing use, but don’t forget that you can’t simply increase the number of globes per plant thinking that you will be providing water over a longer period of time, as this will only increase the rate of water dispersion, possibly harming your plants.
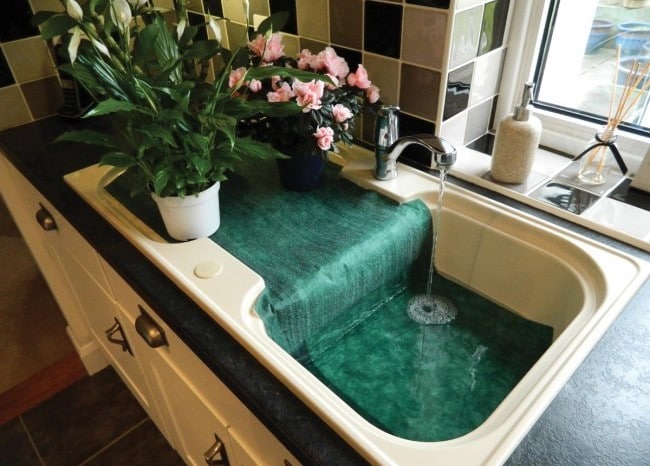
Plant Baths
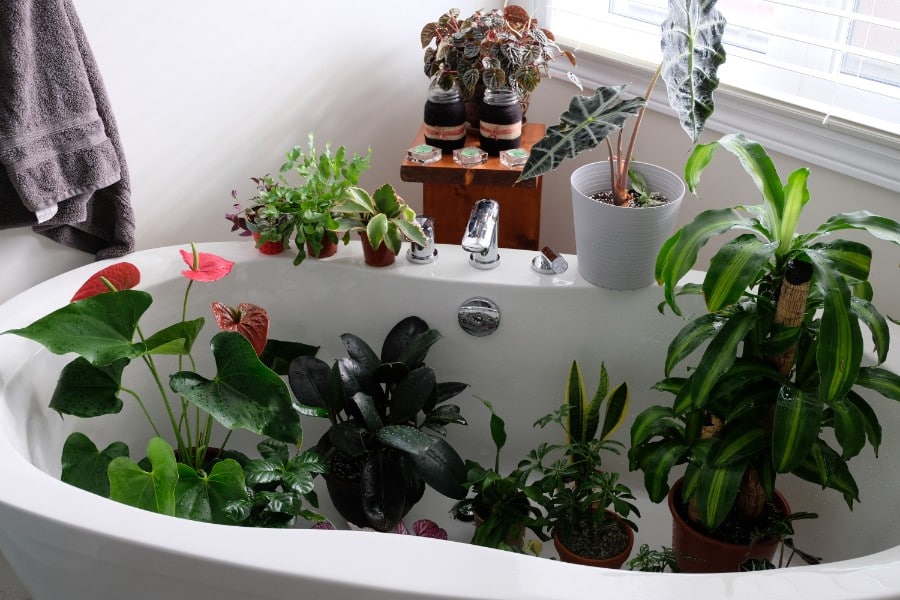
For an ultra-low-tech self-watering solution, there’s the plant-bathing method.
This automatic watering solution involves filling a sink or tub with several inches of water and setting your watered potted plants in it. You may want to place a towel or other cloth in your tub to protect it from being scratched. Importantly, the pots need to have drainage holes for this to work.
The plant bath technique may be a great option for smaller houseplants, but it’s not for large plants that are difficult to lift. It also won’t work if the tub is in a location such as a windowless bathroom,where there’s not enough light for the plants.
Capillary Mat
Somewhere between the wick system and the plant bath lies the capillary mat. It’s named after the mechanism called “capillary action” that is responsible for wicking water from a reservoir to the soil (and on to the plant roots) via some type of absorbent material. As with the plant bath, this method of self-watering is only suitable for easily moveable plants in pots with drainage holes in the bottom.
You can easily find capillary mats at gardening centers, but for all you DIY types, here’s how to make your own.
What you need to make a DIY capillary mat:
- Large tray
- Section of 1-inch-thick Styrofoam cut to fit to about 1 inch from the edge of the tray on all sides
- Section of absorbent fabric such as wool, felt, or cotton cut to fit the Styrofoam so it hangs down and touches the tray on two ends
- Nails or tacks to secure the fabric to the Styrofoam
Fill the tray with water, making sure the fabric is saturated but not submersed. Then, when you place your just-watered potted plants on top, the fabric will serve as a wick, which is why it’s important that it hang down to touch the tray. This will ensure that it remains in contact with the water as it gets used up by the plants.
Miniature Greenhouse
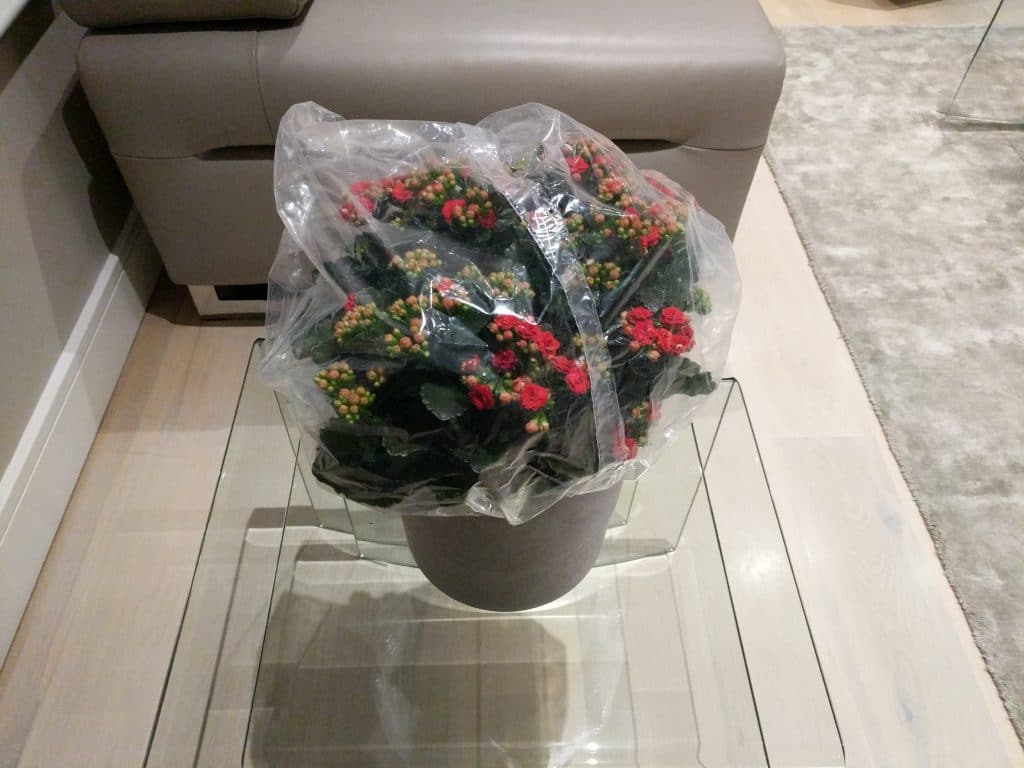
Not so much a self-watering system as a water recycling system, miniature greenhouses created with plastic bags capture all the moisture generated by evapotranspiration of the potting soil and the plant and allow it to drip back down for reuse by the plant.
To create one of these mini greenhouses, you’ll need a clear plastic bag that is big enough to fit comfortably over the plant. You also may need sticks or stakes of some kind to hold the bag up and away from the plant.
You simply place the watered plant in the bag and carefully pull the plastic up so you can close it with a bit of string or twine at the top. Don’t worry if the plant touches the plastic here and there – what you want to avoid is having the bag clinging to or pushing against your plant. To help ensure this doesn’t happen, blow some air into the bag just before sealing it shut.
Warning: No matter how much your plant likes bright lighting, make sure that the plastic-covered plant will not be exposed to direct sunlight, as heat will build up inside the mini greenhouse and cook your poor plant to death!
Self-Watering Pots
While all of the solutions for watering indoor plants while on vacation discussed so far have been ways to take care of houseplants that are already potted, this automated plant watering solution will involve repotting your plants.
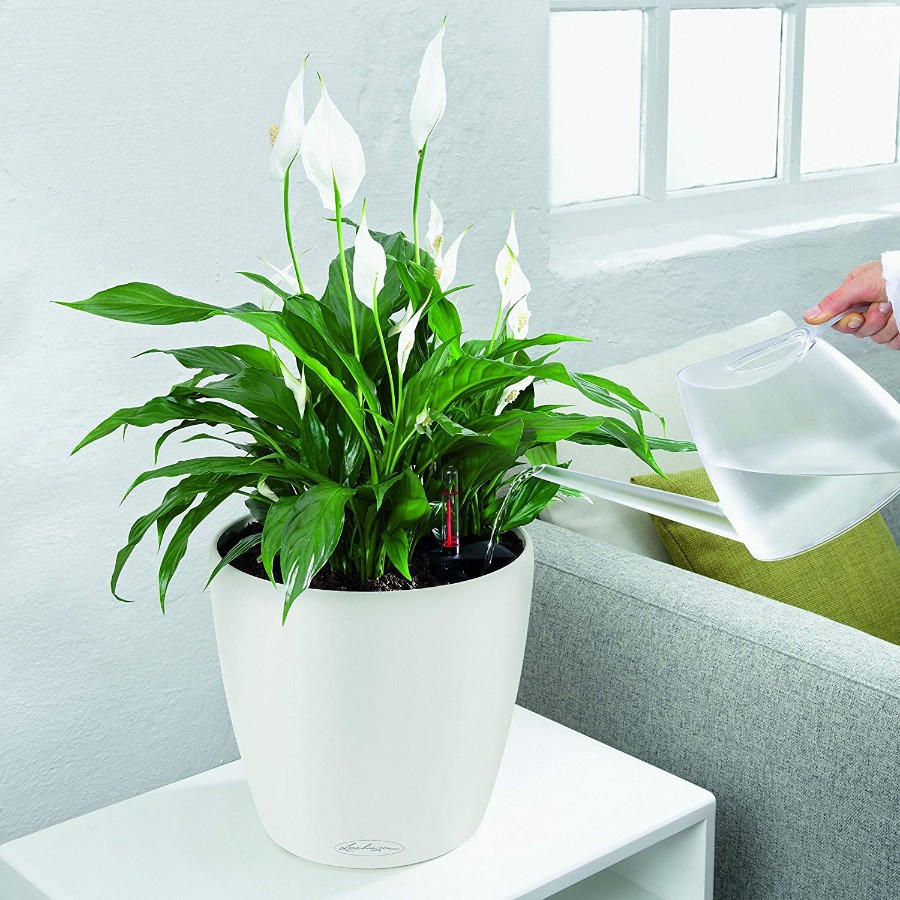
Self-watering pots and containers have built-in water reservoirs at the bottom and are meant to offer a way for busy people to keep their plants watered without worrying about over- or under-watering.
Instead of constantly monitoring the soil moisture levels of every plant, you simply put water in their reservoirs, and it gets delivered from there to the plants. A water level indicator lets you know when it’s time to put more water in each reservoir, which you fill through a shaft or other opening in the container.
The simplest types of self-watering pots use wicking action to deliver the water, while there are more advanced plantersthat utilize automated drip systems, sometimes witha pump. Some of the commercial self-watering pots on the market are actually mini soilless hydroponic systems.
It’s easy to make your own self-watering planter. One basic design starts with a container of any kind that does not have drainage holes in the bottom, as that’s where your water reservoir will be.
What you do is create a barrier to separate the reservoir from the area with the growing medium above
Alternatively, if you have a pot or planter that does have drainage holes, you can make a reservoir by finding a watertight container with a lid that fits fairly snugly into the bottom of it and poke small holes in the lid for aeration as well as making a hole for the watering shaft.
Since you won’t be able to see the reservoir, you will need a water level indicator, which you can make out of a small piece of floaty material such as Styrofoam with a stick attached to it. You just remove this when pouring water in.
The other thing your DIY self-watering pot needs is a wicking mechanism. A simple way to create one is to feed pieces of rope or strips of durable absorbent material through holes or slits in the top of the reservoir, making sure one end touches the bottom of the reservoir
You usually need to water plants that are newly repotted from the top forabout 12 weeks or so before switching to the reservoir while the plant roots establish themselves in the new growing medium.
If you’d prefer something more sophisticated or stylish, there are many commercial self-watering pots available on the market. Here are a few of them:
- Lechuza Classico
- Algreen Valencia
Grobal Self-Watering Flower Pot- Santino Self Watering Planter
- Mkono self-watering planters
Smart Home Automatic Watering Solutions
This section is for those who are interested in a smart-tech solution to watering indoor plants while vacationing. With these handy automated drip systems, you can water many different plants out of a central reservoir using individualized settings, so you can deliver just the right amount of water for each one:
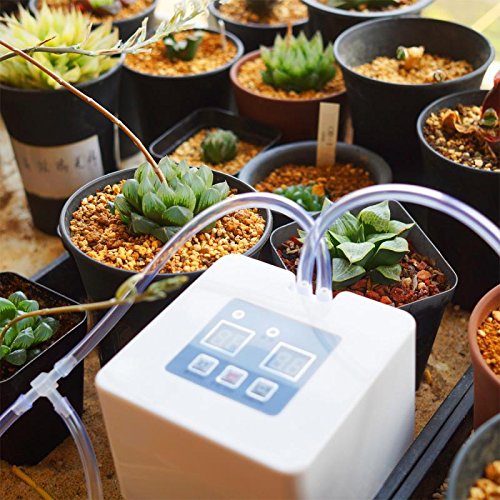
- Claber 8053 Oasis 4-Programs/20 Plants Garden Automatic Drip Watering System
- RUN-snail DIY Micro Automatic Drip Irrigation Kit
Houseplant Watering FAQ
Now that you’ve learned about techniques and products that automatically water plants so can enjoy your vacation without worrying about neglecting your indoor plants, you may be interested in the answers to these questions about watering houseplants:
How do you water a potted plant?
When watering a potted plant, the aim is to saturate the potting mixture and then allow the excess water to drain out of the pot. You can apply water directly to the surface of the potting mixture or set the pot in a couple of inches of water and allow the soil to soak it up from the drainage holes in the bottom of the pot – in other words, the plant bath technique.
Regardless of which method you choose, don’t allow the pot to sit in water for more than about 15 minutes, unless it’s one of the types of houseplants that prefers constantly moist soil.
What types of houseplants prefer constantly moist soil?
Plants with lots of leaves or leaves that are thin rather than thick and fleshy need frequent watering. This includes smaller plants such as herbs, baby’s tears, and spike mosses, as well as larger plants like umbrella palms and overwintering canna lilies.
What factors influence how much water indoor houseplants need?
- Plant type
- Plant size and age
- Growing phase
- Pot size and material
- Growing medium type and condition
- Indoor conditions: Light, temperature, humidity, airflow
- Regional climate
- Season of the year
- Current weather