One of the great things about growing succulents is that it’s typically very easy to propagate them. For those of us who are hooked on succulents, this means we can maintain as well as multiply our collections with little effort – and for free!
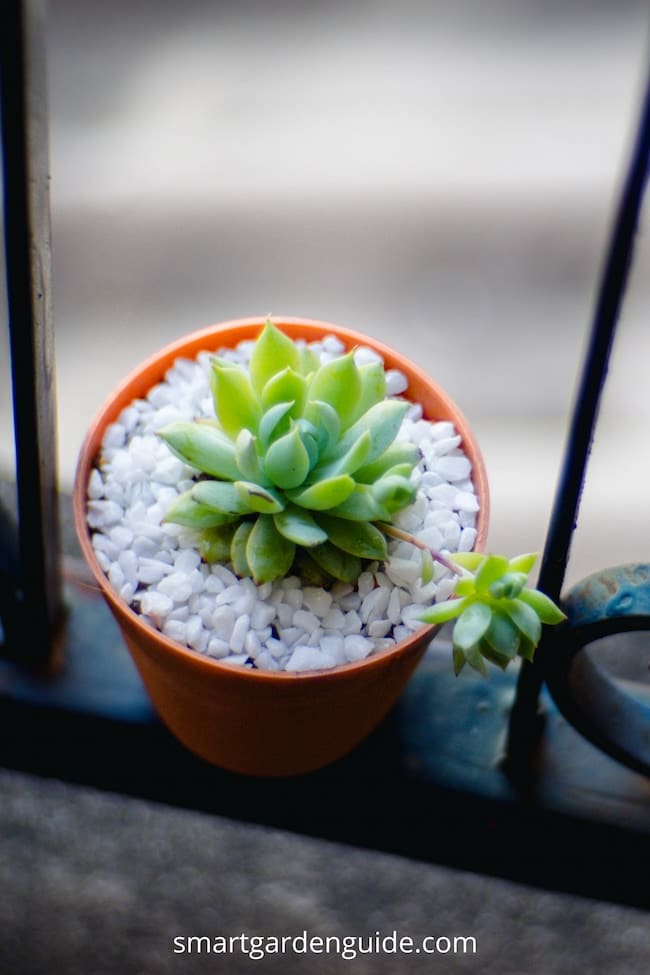
It even seems that some types of succulents, such as echeverias, encourage us to collect and grow ever more of them when they produce “chicks” that sprout up around the base of the mother “hen.” But harvesting these chicks is just one of several simple ways to propagate these lovely rosette-forming succulents.
So if you are interested in learning how to propagate echeveria succulents to revive a mature plant, liven up a container garden or window display, or spread the love by giving them out as gifts to friends and loved ones, just follow the step-by-step instructions in this practical guide to propagating echeveria plants.
Four Ways To Propagate Echeveria Succulents

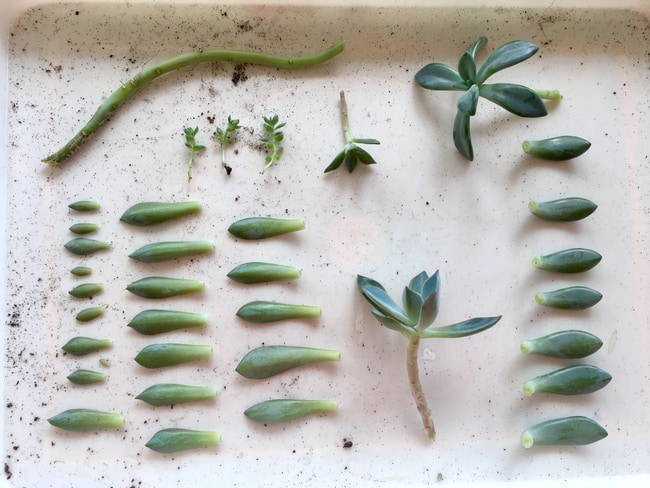
There are four different ways you can propagate echeveria plants:
- Separating offsets
- Leaf cuttings
- Stem cuttings
- Germinating seeds
Separation of offsets, the little clones that are also known as“chicks” or “pups,” is the quickest and easiest way to propagate echeverias, although it can only be done when the mother hen produces a brood.
Propagation by leaf cuttings is almost as easy and can be done with any healthy plant at any time, as the thick, fleshy leaves of echeverias tend to sprout roots and grow into new plants quite readily.
Propagation by stem cuttings is also pretty easy. However, since this method is best done with plants that have branches or stems, it’s not the most common method for echeverias with rosettes that grow low to the ground.
Propagating echeverias with seeds is the slowest method. It requires patience and a little more attention than the other methods do, and you have to acquire the seeds, by either collecting them from your plant’s flowers, purchasing them, or gaining them from another succulent enthusiast. And note that certain types of echeveria plants produce seeds that are sterile.
So, those are the four possible ways to propagate echeveria succulents. Now, I’ll walk you through the steps and other details about how to carry out each method.
How To Propagate Echeveria Succulents By Separating Offsets
Using offsets is my favorite method for propagating echeveria plants because the parent plant has already done the work of getting the new plants started for me! Whenever my echeverias put out a brood of baby chicks, I’m filled with glee at the prospect of harvesting the new plantlets and getting creative about how I can put them to good use.
Another case when you will want to use this method is if you remove the rosette from an echeveria stem to use as a stem cutting and leave the base of the stem to its own devices. It will develop offsets that you can remove and grow as new plants, perhaps even replacing the old, chopped-off stem they developed from.
Begin the process by getting a good look at the base of the plant and its newly forming clones. You may need to carefully brush away any topsoil that’s covering over this area.
If the offsets are securely attached to the stem of the parent plant, use a clean, sharp knife or pair of pruning shears to cut them off. Or, you may be able to gently pull them away from the parent plant. If you have more mature offsets that have begun to develop their own root systems, be careful to keep the roots intact while separating them.
Brush any dirt away from the bottom of the separated plantlets and set them in a warm spot that gets ample indirect sunlight for a few days to allow the cuts to callus over and let any roots that have formed to dry out. This step is important to prevent rot and disease from attacking the offsets when you plant them in soil.
To plant the little pups, prepare a growing container with some fast-draining succulent soil, wet the soil, and if you have a bit of stem below the rosettes or any new roots, place the bottom portion of the plantlets in shallow holes and fill in the holes to support the plants.If you only have young buds with no stem or roots, simply set the buds right side up on top of the soil. Place the plants in a location that gets plenty of indirect sunlight while they are taking root.
Over the next four weeks or so, only water the plants lightly. You want the soil to remain relatively dry to encourage the root systems to expand in search of water. Misting the soil well once a week is a good way to ensure you’re not moistening the soil too much.
The young plants will be ready to repot when a gentle tug meets resistance, indicating that they’ve rooted.
How To Propagate Echeveria Succulents By Leaf Cuttings
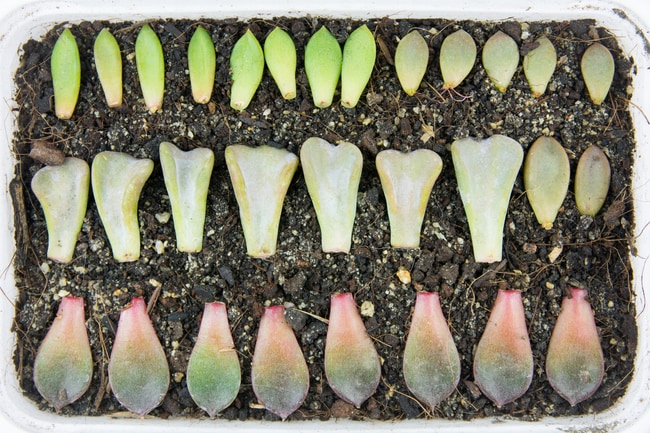
Propagating succulents by leaf cuttings takes longer than using offsets, but it’s fascinating – just short of miraculous, really – to observe a plant leaf developing roots and generating a whole new plant right before your very eyes. This method of propagation works great with echeveria plants because their fleshy leaves are both filled with nutrients and easy to cleanly remove from their stems.
To help ensure successful propagation, select healthy lower leaves from mature echeveria plants, making sure they don’t have any scars or other signs of damage or weakness. Remove each leaf by gently grasping and moving it from side to side until it snaps off. Leaves that are primed for developing into new plants will snap off easily.
You need to have the entire leaf, so discard any leaf that’s torn, leaking moisture, or missing a part. Also, pull a few more leaves than the amount you’d like to propagate, in case any of your leaves fail to develop into plants.
As with offsets (and any other type of cutting, for that matter), the next step is to set the leaf cuttings in a spot that’s warm, dry, and brightly lit but not by direct sunlight for a few days to allow the wounds to callus over.
Next, prepare a shallow tray or dish with fast-draining succulent soil, wet the soil, and simply set your leaves on top. You can apply rooting hormone to the base of the leaves if you want, but I find that it isn’t necessary with echeveria leaves. The leaves should remain out of direct sunlight so they don’t shrivel or burn.
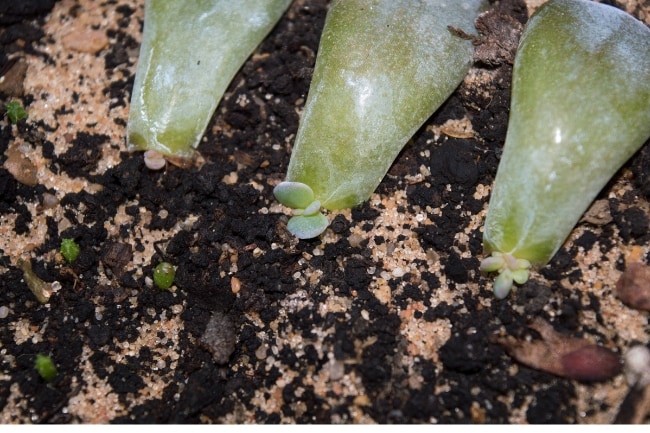
Over the following weeks,lightly mist the leaves and soil every couple of days to keep them from completely drying out. It’s amazing to watch as roots begin to emerge from the base of the leaves and tiny new rosettes form above them, drawing their nutrients directly from the leaves. When the roots have developed a bit, cover them with a thin layer of soil and continue misting.
Eventually, the leaves will be entirely consumed by the new plants and the roots will become established enough to handle replanting. If the withered remains of any leaves are still attached to the new plants, gently remove them when you go to repot your new echeveria plants.
How To Propagate Echeveria Succulents By Stem Cuttings
 I use this succulent propagation method whenever one of my more mature echeveria plants develops a leggy stem and I want to reestablish a more compact appearance. This method is best done in the springtime, at the beginning of the plant’s active growing phase.
Sometimes, when applied to echeveria rosettes, this method is described as “beheading,” which is a little too gruesome sounding for my tastes! But what it entails is cutting off the rosette with a clean, sharp knife or pair of pruning shears and placing the cutting in soil to take root.
Since it’s generally recommended that you include in your cutting at least two nodes, which are the marks on a stem that indicate the base of a bud, leaf, or branch, it’s easy to see why this isn’t the primary method for propagating ground-hugging echeverias. However, as long as you can include an inch or two (2.5-5 centimeters) of stem beneath the lowest leaves of the rosette, it should work.
Set your cutting in a warm, dry location that gets plenty of indirect sunlight for about four days to allow the cut to callus over before planting it in slightly moist succulent soil. If you are propagating your new plant in the same container that you’d like to keep it in after establishing the roots, choose a pot that’s about as wide as the rosette, and make sure it has a drainage hole for the best results.
For two weeks, keep the plant out of direct sunlight and only lightly mist the soil every few days when it’s completely dry. Then, for the next several weeks, mist the soil well just once a week. This watering schedule will encourage the roots to grow in search of water.
The leaves of your echeveria will probably show signs of dryness during this period, but once the roots are established and are able to draw sufficient water for the plant, the leaves will plump back up, and you can begin to reintroduce the plant to direct sunlight by 30-minute increments every couple of days as well as returning to the normal succulent watering routine. Here is another great article that covers propagating succulents by stem cutting.
Propagating Echeveria Succulents By Seed
Here, we come to the most involved method of propagating echeveria plants. But before going through all the steps for this method, I should mention that echeveria varieties that are a hybrid of two different species tend to produce seeds that are sterile. However, if it’s a hybrid of different varieties of the same species (or it’s not a hybrid at all), the seeds should be fertile – as long as they’re not too old.
So, you can collect the tiny black seeds produced by your own echeveria plants by harvesting them from the pods of flowers that have bloomed and closed up again. Although not all echeveria plants will flower, you can encourage mature plants to bloom in the springtime by keeping them cool and dry during the winter and placing them outdoors if there’s no risk of freezing, so they will experience a marked difference between daytime and nighttime temperatures. Also, make sure to care for them properly so they are healthy enough to have the energy to produce blooms.
If you choose to purchase seeds instead, be sure to buy them from a reputable dealer. And regardless of how you’ve obtained them, only use fresh, dry seeds to grow your plants.
Now, on to germinating the seeds. You should do this in the springtime to give the plants the longest growing season possible before they go into winter dormancy.
To prepare your dust-like echeveria seeds for planting, first make a mixture of one part seeds to two parts very fine sand. Next, prepare a growing tray with fast-draining succulent soil and water it thoroughly. Then spread the softened seeds sparsely over the soil.
Place the planter in a warm location with plenty of indirect sunlight and mist the seeds daily. To help keep the seeds moist and warm, particularly if you live in a cool or dry climate, consider covering the planter with a large clear plastic bag or plastic wrap, or use some other method of making a clear shell to create a mini greenhouse.
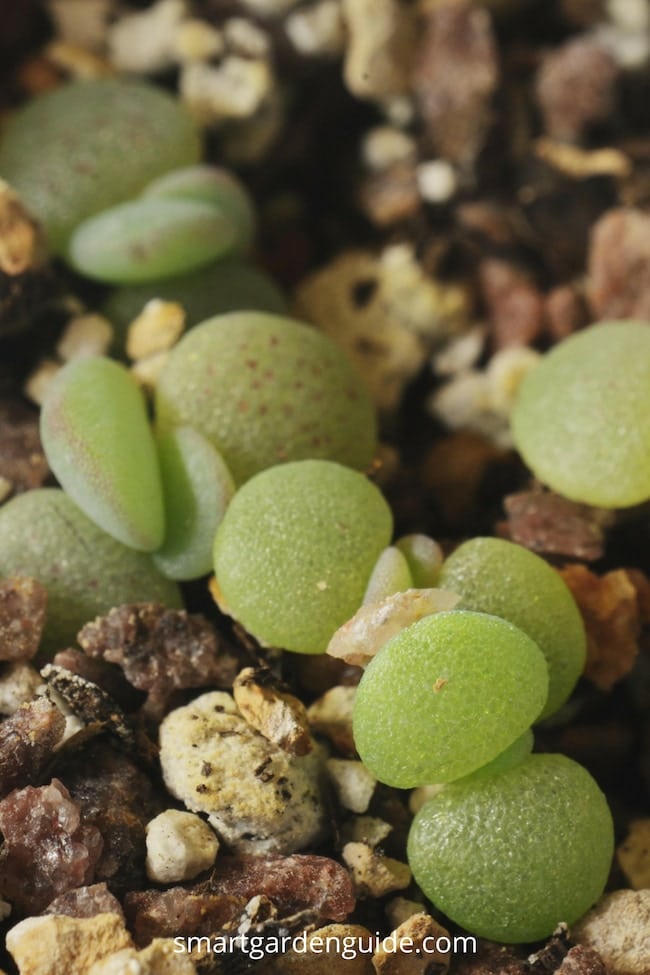
After about two weeks, your seeds should start to germinate, and seedlings will begin to appear at around three weeks, at which point you should remove the cover. After six weeks, you can begin watering the seedlings less often, allowing the surface of the soil to dry out between waterings.
It takes about two months for true leaves to begin forming. The new plants will be ready to repot when a gentle tug meets resistance, which indicates that your echeveria plants have successfully rooted.
If you want to learn some more about growing succulents indoors, I’ve written a useful guide over here.