Clivias really know how to put on a show – the unfolding of their vibrant buds is a dramatic herald of spring. They make no-fuss houseplants that enjoy a certain studied neglect, with a few twists. Let’s take a look at some Clivia care tips to keep your plant thriving and blooming every year.
Clivia Care Summary: Clivia isn’t a bulb plant, but it’s treated like one. To bloom, Clivias need a six- to eight-week cool dormancy period with little water. Otherwise, indoor temperatures and humidity are perfect for them. They thrive with bright indirect light, well-draining soil, light watering and moderate fertilization.
Overview Of Clivia Miniata
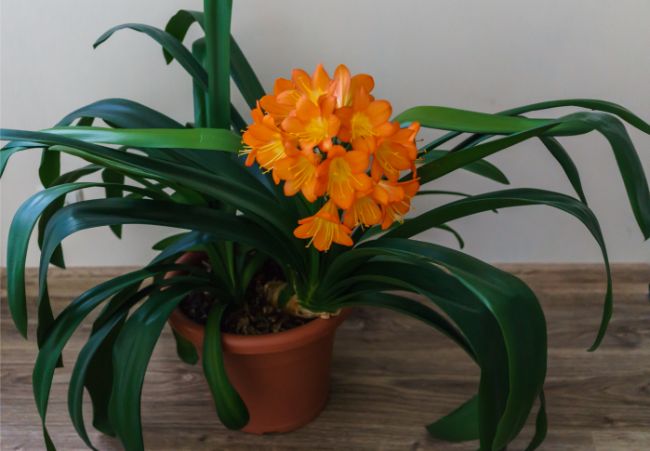
The Clivia, also called a Bush Lily or Kaffir Lily, is an easy-care plant that’s a pleasure to grow. It’s a cousin to the Amaryllis, and despite the common name, is not a real lily. It’s named for Charlotte Clive (1787–1866), governess of Queen Victoria.
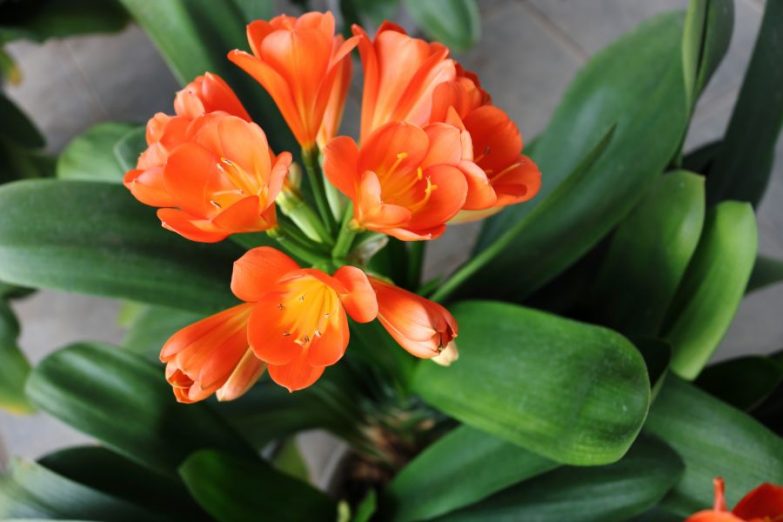
Clivias make an unusual and elegant alternative to traditional holiday plants. They require a cool-season resting period to flower, and afterwards bloom in late winter just when a cheerful blast of color is most needed. Their flowers arrive on thin stalks in clusters of up to 20 tubular red, orange, yellow or cream-colored blossoms. The strap-shaped leaves provide evergreen color.
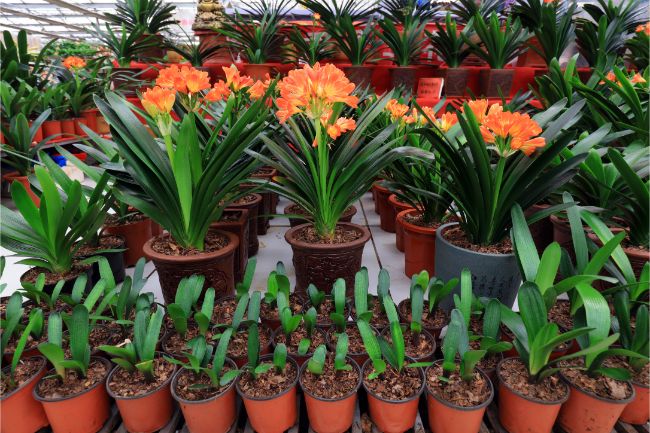
The standard Clivia variety is orange with yellow centers. The tall flowering stalks make excellent cut flowers. Their blossoms produce decorative seedpods that slowly change color as they mature.
Outside in warm climates, Clivias can be either a striking border or accent plant. They bring color to shady spots where most flowering plants don’t thrive, and aren’t needy about watering or feeding. They’re excellent houseplants, too.
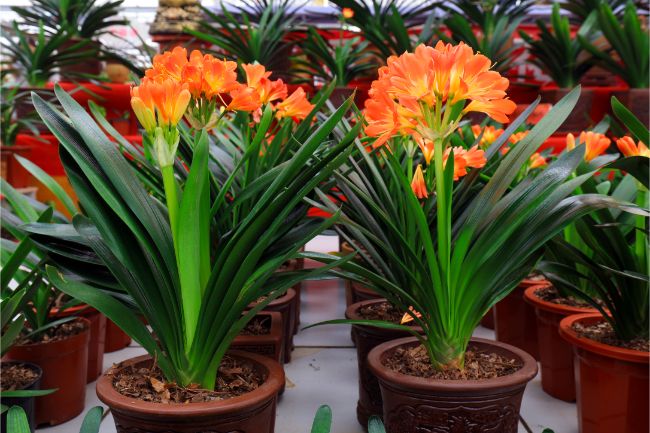
Clivia are long-lived and fill a pot over time. Often passed down as heirlooms, the plant becomes more striking as it matures. Their colors tend to deepen as they age. Clivias can grow into centerpiece attractions almost three feet high and wide.
It takes a long time to grow Clivias from seed: don’t expect them to bloom until their fifth year. Offsets mature more quickly, but it still takes several seasons to see blooms. For this reason, many growers prefer to buy more expensive older plants.
| Scientific Name | Clivia miniata |
| Light Requirements | Bright, indirect light. |
| Watering | Water once the top half of the soil is dry. Will tolerate underwatering better than overwatering. |
| Soil | Fast draining potting mix. Orchid bark or a mix of peat, perlite and coarse sand. |
| Temperature | 60°F (16°C) to 75°F (24°C) |
| Fertilizer | Feed monthly after blooming with a 1/2 to 1/4 strength 20-20-20 water-soluble formula through the growing season. |
| Humidity | Prefers lower humidity. |
| Flowering | Needs 6-8 weeks of cooler temperatures to trigger blooming. (50-55°F). Rich red, yellow, orange or cream blooms |
| Pruning | Just remove dead leaves and flowers. Otherwise, no pruning required. |
| Propagation | Division is best. Can be grown from offsets and seeds, but will take several years to bloom. |
| Re-Potting | Likes being root bound, so only repot every few years. |
| Diseases and Pests | Mealybugs and scale are most common. Prone to fungal and bacterial disease if overwatered. |
| Toxicity | Quite toxic to humans and animals. |
| Where To Buy | Buy Clivia online at Etsy (I buy most of my houseplants from Etsy). |
Clivia Care And Characteristics
The Clivia is native to Africa, where they live in full or partial shade as subtropical forest plants. They can be found growing on rotting logs and other organic material.
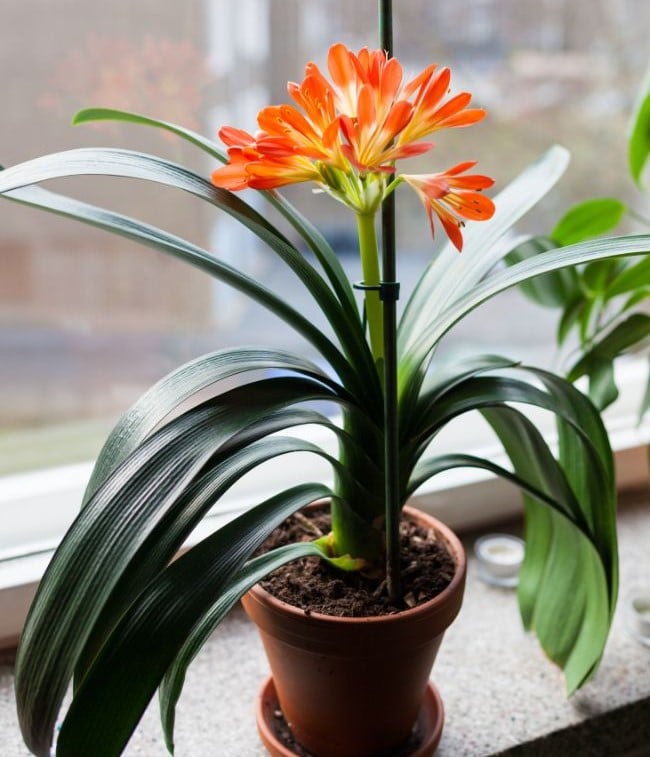
Though slow-growing, Clivias eventually become quite large for a houseplant. They can take a decade to mature and fill a sizeable container. The durable dark-green leaves are long and arch attractively over each other. Clivias add about three to six leaves a year (and may lose a couple), forming them from the center.
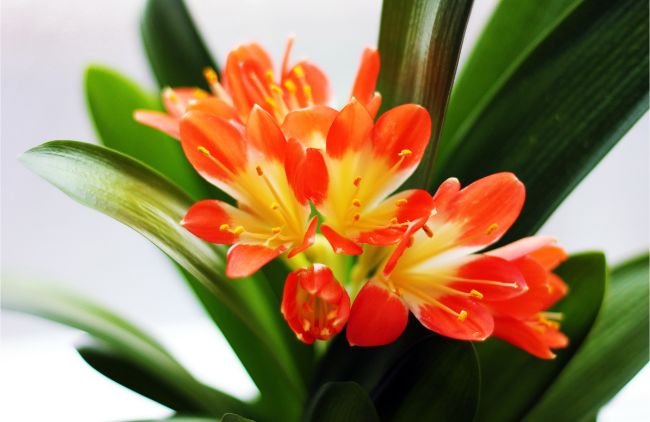
Clivia’s spectacular blooms are from one to three inches in size. They bloom for about four weeks as the weather warms – flowering typically begins from February to April.
An active growing period follows blooming, when they need warmth, indirect sunlight, and modest watering. They appreciate additional feeding while they grow.
After the warm season, Clivias need a six to eight week dormancy. Once warmer temperatures start, you can begin regular care, and enjoy their flower show.
Butterflies, birds, and bees love Clivia plants; unfortunately, they are toxic to pets and people.
Clivia Light Requirements
Clivias are naturally adapted to living in full to partial shade when outdoors, which translates into bright indirect light inside. They can survive dimmer conditions but require good light to bloom.
Though they are low-maintenance flowering plants, direct sunlight quickly scorches them, so getting lighting just right is important for good clivia care. Sunburn shows as brown spots on foliage and ruined flowers.
A northern or eastern exposure is generally ideal indoors, but they do well in any sunny spot if protected from direct sun. Container plants like being moved outdoors for the warm season, but remember that they require shade.
How To Water A Clivia
Clivias like evenly moist soil in the growing season, but they don’t tolerate overwatering.
A good rule is to let the top 50% of the soil dry out before a thorough soaking. Outdoor plants can be watered manually if the top few inches of soil has dried out. They become more drought-tolerant as they become more established; they appreciate a layer of mulch.
A Clivia’s fleshy roots rot easily in soggy conditions. Also, avoid getting water in the crown. Orange or pale green spots on leaves can be a sign of overwatering.
As the plant enters cool-season dormancy, cut back on watering. While the plant rests, give it just enough to keep it from shriveling.
Clivia Soil Requirements
Fast-draining potting soil is essential for good clivia care. Regular retail soil is usually too heavy – you need an airy medium that keeps their roots from becoming waterlogged.
A soilless mixture can work; orchid bark is a popular Clivia medium. If you use peat moss, add aeration materials like perlite or coarse, gritty sand. Consider your area: a little extra peat or other water-holding material is okay for hot, dry areas but not for cooler, wetter climes. Stay away from fine particulates that compact.
As long as the medium drains quickly, Clivias favor organic material in their soil. Compost and leaf mould are excellent. They tolerate a wide pH from 6.1-7.8 pH, but prefer a mildly acidic value. Note that bark or peat can acidify the soil as they decompose.
I’ve written an article which explains everything you need to know about choosing and making houseplant soil. Check it out if you’d like to learn more.
Clivia Temperature Requirements
Clivias enjoy a comfortable range of 60°F (16°C) to 75°F (24°C) throughout the growing season. They don’t mind some heat but prefer cooler conditions. They are hardy outdoors in USDA Zones 9-11.
Dormancy is the time when Clivias gets more particular. Without a resting period to reset their flowering cycle, the plant will stay evergreen but won’t bud the following year.
How To Fertilize Clivia Plants
After your Clivia has bloomed, they’ll do well with a monthly feeding of a ½- or ¼-strength 20-20-20 water soluble formula through the growing season. Either synthetic or organic fertilizers will work, but apply dry granules or powder away from the plant’s base to avoid nutrient toxicity.
Some Clivia growers find adding slow-release fertilizer early in the growing season is a convenient option.
Stop fertilizing completely as the weather begins to cool in the fall and hold off until dormancy is complete. Outdoors, they can be fed every other month until the growing season ends.
One exception to these guidelines is to fertilize right as blooming begins: a modest ½-strength boost with a high-potassium formula as the plant exits dormancy can produce good results. Don’t overdo it.
After this early feeding, wait until flowering is over before resuming normal warm-season fertilization.
Humidity
Clivias are one of the few tropicals that don’t need high humidity and shouldn’t be misted. They prosper in an arid environment as long as the temperature stays within their preferred range.
They never like a stuffy, heated room. If their leaves look tired, a gentle sponging can give them a lift.
Flowering
Clivias rest after the growing months and will bloom the following season as they come out of dormancy.
Flowering can happen anytime from late winter through early summer. Older specimens tend to produce buds earlier, but their timing can vary.
Here’s what to do:
- Move your houseplant to a well-lit spot indoors before the first freeze. Gradually reduce watering. In the plant’s native habitat, rain occurs during the warm months – they expect to dry out over the cool season.
- Give the plant from six to eight weeks of cool temperatures. Daytime temperatures should be from 50-55°F (10-13°C), with colder conditions at night – but don’t let it freeze. Only water enough to keep it from shriveling.
- After its rest cycle, move the plant to a warmer location of about 60-65°F (16-18°C) and carefully begin regular watering. A budding stalk should appear within a few weeks.
- Rotate the container as the stalk grows and the buds mature. The blooms seek light and bend strongly towards it.
The spent blossoms develop into cherry-sized seed pods that slowly turn red or yellow over a period of months. The seeds will be fertile if pollinated. Some growers leave the ornamental berries; others prefer to cut the stalk at the base to conserve the plants energy—it’s up to you.
Pruning
The only pruning a Clivia needs is removal of dying leaves and flowers. You may see tattered leaves after dormancy, but grooming is best done in the growing season once flowering is over.
Cut declining foliage near the base with sterile shears. The bloomstalks can remain for over a year while their seedpods develop or may be removed after blooming.
How To Propagate Clivia
There are a few ways to propagate Clivias, including root division, offsets, and seeds.
The main challenge in reproducing Clivias is their slow maturity. Offsets grow more quickly, but it still takes several seasons to see flowers.
Here are the standard propagation methods:
Offsets – Allowing offset “pups” to mature is the easiest. Just let them grow in the parent’s container until you’re ready to repot. Young offsets without roots can be put in soil to grow them.
Root Division – Over time the plant will outgrow its container and will need to be divided. This can be messy, but the roots are surprisingly hardy. It’s common to divide every three years.
Divide the roots into clumps so that each has leaves and some roots attached. Pot in a well-draining mix and care for them normally.
Seeds – Growing from seeds isn’t hard, it’s just slow. Allow the seed pods to dry on the stalk: this takes about eight months. Remove the fleshy coating from the pods when ready. Wear gloves to avoid skin irritation.
Place the growing medium in a warm area. The seeds rot easily, so press them into their mix rather than burying them. Keep the soil damp but not wet.
A thick root emerges upon germination that can push the seed out of the soil. Make a hole with a chopstick or pencil and replant to keep the seed on the (slightly) moist surface. Give seedlings bright light, and repot once they have several true leaves.
Tips For Planting
- The plant is picky about being fussed over. Too much watering, overfertilizing, or repotting can discourage flowering.
- Keeping a Clivia rootbound helps them bloom better.
- Adjust watering frequency according to the temperature. Let the soil dry out more thoroughly in cooler conditions.
- If you put your potted Clivias outdoors for the warm season and your area receives substantial rainfall, site them in a covered spot.
- Buying Clivias out of bloom makes it hard to verify their shade, but their stem color offers clues. Purplish hues indicate the plant bears orange flowers. Yellow-flowered specimens typically have green stems.
Re-Potting Clivia
Clivias do best when rootbound: even a plant pushing itself out of the pot isn’t necessarily in distress. They don’t like being disturbed and can live happily in one container for years.
Repotting should be done in the spring after flowering. Roots in a full Clivia pot will be tangled up tightly—they look like fat noodles—but it’s okay to cut the ball in half and divide out the roots between the plants and offsets. It’s easiest to hose the dirt off the roots to see what you’re doing.
Plants will grow from sets with just a few roots attached. You can repot two or more plants together.
The new container size should be more snug than loose; a heavier pot keeps them from toppling over as the plant grows. Make sure the container has plenty of drainage holes.
Clivia Varieties
Clivias are easily hybridized: new varieties have increased the plant’s popularity and established a worldwide fanbase of collectors.
In the US, the most common Clivias are orange hybrids from Belgium. Less-seen colors are reds, light yellows, and even lime green.
China has bred unique specimens with variegated leaves and varying dimensions. Use discretion when buying these: some plants don’t reach full size until they are 10 years old. Also, the patterned leaves of some varieties can be unstable and may disappear with stress.
Diseases And Pests
Clivia care isn’t impacted too much by insects, though the Amaryllis Borer devastates plants in their native South Africa. Mealy Bugs love the plant’s many leaf folds and are the most common threat, though scale can also be an issue.
If you notice the situation early, simply wiping the colonies with alcohol or a neem-based oil will clear them. Heavier infestations may require an organic or botanical insecticide. Read more about getting rid of houseplant bugs naturally.
Clivia are most vulnerable to moisture-related fungal and bacterial problems. You shouldn’t have trouble if you avoid overwatering and give them good airflow.
Toxicity
Clivias contain Lycorine which is quite poisonous to dogs and cats: a large ingestion can cause weeks of diarrhea or even death. The seeds and berries are the most toxic.
While the plant isn’t as dangerous to humans, you should still wear gloves when handling it to avoid skin and eye irritation.
Clivia Care Problems And Questions
Why do my Clivias have yellow leaf spots?
Yellow spots usually mean the plant is getting too much sunlight or is overwatered. Even a little direct sun on dry leaves will turn them yellow and crisp their tips.
If your plant is rootbound, great – but check the soil for trapped pockets of stagnant water. Sometimes water collects in the heart of the plant, too.
My blooming stalks are too short – the flowers are buried in foliage.
This is a common issue with clivia care, but the cause isn’t always clear. It may be a dormancy that’s too warm or too wet, or simply the plant’s genetics. One possible solution is water the stalk thoroughly just as its buds appear.
When will my young plant bloom?
A Clivia’s maturity is generally measured by its number of leaves—the more there are, the older the plant. A rule-of-thumb is that a plant needs at least 12 leaves before it will bloom.
I haven’t seen a bloom in years – do some Clivias lose the ability?
No, it’s just waiting to reset. Clivias remain healthy with year-round warmth, but they don’t bloom unless they receive a cool, dry rest period. With correct care, even plants that haven’t flowered for many years will bloom.
I’m thinking of buying exotic Clivia seeds online – I love the blue and purple colors.
Be wary of unscrupulous sellers, who can change a purported plant’s image to show unusual (and unavailable) colors. These outfits won’t be around by the time you discover your seed-grown Clivia is the wrong color: only buy from a reputable vendor.