Is your potted plant looking pale or yellow and generally not too happy? If your plants aren’t thriving, you may need to aerate the soil in your potted plants to increase drainage and airflow to improve the health of the roots.
How to aerate soil in potted plants? You can aerate soil in potted plants by breaking up the existing soil, mixing aerating additives into the soil, changing to a porous pot, or changing to a more lightweight, aerated potting mix.
Potted plants need well aerated soil to deliver oxygen to the roots, but they can’t rely on nature’s aerators, like worms and other underground burrowers, to create air tunnels for them. Let’s explore some easy ways to get your plants the breath of life they need!
Getting To The Root Of The Problem
Water is a good thing for plants, right? It’s one of the four essential elements all plants need to grow: air, water, nutrients and sunlight. The problem is that when plant soil is oversaturated, it blocks off one of the essential elements: air. It’s akin to drowning your plant’s roots.
Plants can survive an occasional overwatering, but if you repeatedly give them too much water and there is no way for oxygen to get into the soil, to be absorbed by the roots. Plants need loose, well-aerated soil to be healthy.
Two of the most important biological processes that plants carry out are photosynthesis and respiration. Photosynthesis takes place in the green tissues of plants and converts light energy and carbon dioxide into sugars. Respiration takes these sugars and along with oxygen, produces energy, along with water and carbon dioxide.
Plants that cannot absorb oxygen from their roots are unable to continue one of the most vital processes that keeps them alive. This is why it is so important to ensure there is good aeration of plant soil, and why overwatering plants can have such a disastrous impact on their health.
The Dangers Of Poorly Aerated Or Soggy Roots
Once roots are left in poorly aerated or overwatered soil for too long, the dangers of losing your plant set in:
- Roots can’t take in air and deliver it to the plant.
- Roots are weakened and become susceptible to harmful bacteria and fungi.
- These organisms attack the roots causing damage and destruction and the ultimate demise of the plant if not treated quickly.
How To Aerate Soil In Potted Plants
Getting air moving through the soil is pretty simple. How you approach aeration depends on the health of your plant and when you are aerating.
Potting A New Plant
If it’s day one and you are just putting your new plant or cutting into a pot, there are ways to do it that ensure your potted friend has a healthy start.
Choosing A Potting Soil
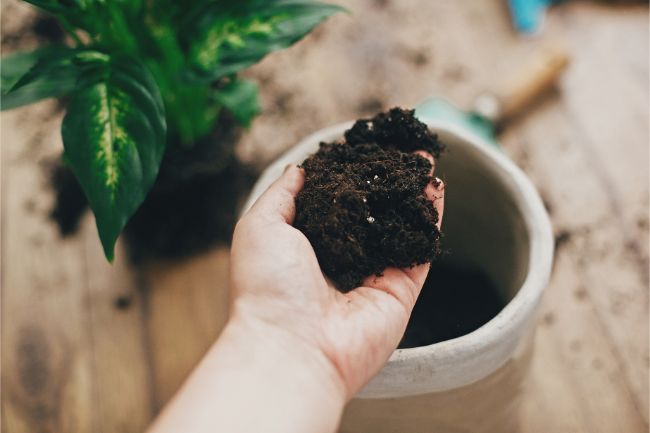
You don’t want to dig up dirt from the garden or just put any old soil into your plant’s pot. A good potting soil should provide a balance of drainage, aeration, moisture retention and nutrient content, and should be tailored to the type of plant you are growing.
There are many different materials that you can add to your potting mix to increase aeration and drainage. These materials help to aerate soil in potted plants while maintaining moisture to a variable degree.
Common Additives To Aerate Soil In Potted Plants
- Perlite: Lightweight and airy, this volcanic rock improves drainage and aeration. Styrofoam is sometimes substituted for perlite in inexpensive potting mixes. It’s more of a space filler than an aerator.
- Coarse sand: Large particles of sand help break up denser soils and improve drainage.
- Vermiculite: A mineral formed by heating mica chips; it improves aeration of the soil, while also retaining water and minerals which can be released slowly as the plants require them. Ideal for plant that have higher water requirements.
- Peat moss: A potting material made from decomposing plants and mosses. It can hold a lot of moisture and release it when needed, while remaining lightweight and providing reasonable aeration.
- Sphagnum moss: A bog moss that is dried and used in soils to improve moisture retention and aeration. Most commonly used in hanging plants that dry out quickly, but also cannot be overwatered.
In short, the composition of the soil you use means a lot. Make sure you choose a mixture that is loose enough to provide breathing room for roots and contains some of the moisture-absorbing material to hold onto water and release it as need it. The right soil will deliver nutrients and support root growth.
A good basic potting soil recipe that I often use is;
- 1 part peat moss
- 1 part perlite
- 1 part good quality topsoil
Making Sure Your Pot Has Airflow
Once you’ve got good potting soil, it’s time to make sure your pot or container is going to cooperate by providing airflow. If you have the best soil there is, but your pot doesn’t allow air in (or water out), aeration will be significantly reduced.
How you aerate your plant depends on what kind of pot you have:
Clay Pots
Clay pots are great for natural aeration of the soil due to the porous nature of clay. This enables air and water to travel freely through the walls of the pot, increasing airflow to the roots.
The porous nature of clay will also increase water loss from the pot, leading to increased watering requirements of your plant. This can be very helpful for plants that dislike sitting in wet potting soil for a long time.
Plastic Pots
Unlike clay, plastic is neither porous nor breathable. It really holds in moisture and prevents air exchange. While one advantage may be that you must water these pots less, the disadvantage is that it’s very easy to overwater a plant in a plastic pot, and significantly reduce aeration. Watering must be watched much more carefully.
If your pot doesn’t have drainage holes, gently create some. Using a nail or a drill (with a small bit), put a few small holes around the pot. Not large enough that soil can fall out. Just large enough to allow air to pass into the soil and excess water to drain out.
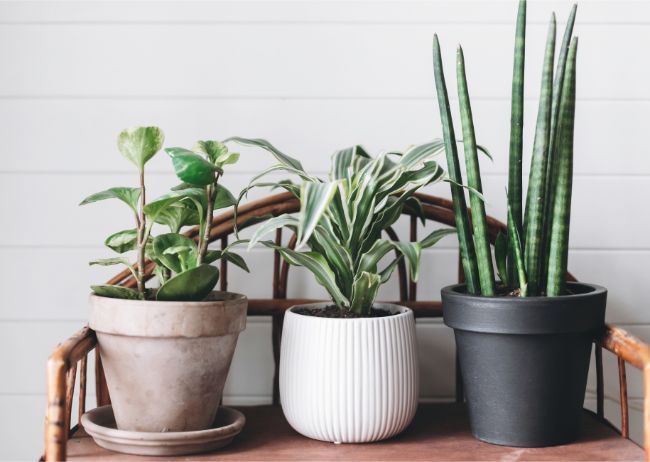
Decorative Metal And Ceramic Pots
Not much can be done to increase the porousness or airflow of these pots. If your container is large enough, one option is to double pot your plant:
- Place rocks or stones in the bottom of the decorative pot
- Pot your plant in a plastic or clay pot that is a little smaller than the decorative outer pot. Ensure the inner pot has drainage holes.
- Place the inner pot on top of the stones in the decorative pot. This allows you to enjoy the great aesthetics of a decorative pot, while still ensuring your potted plants have great drainage and aeration.
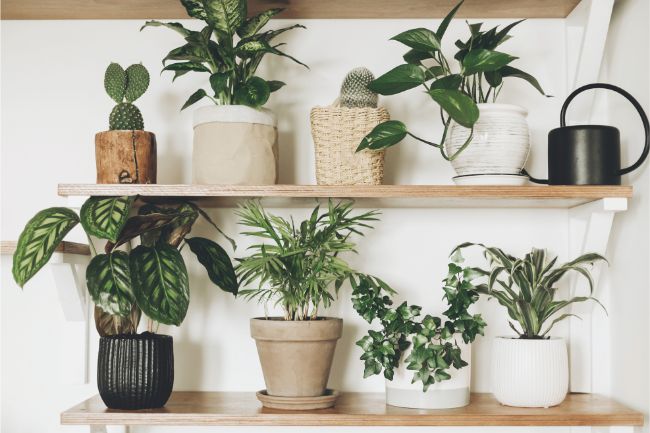
This is a technique I use with almost all my indoor plants. I love the variety of being able use beautiful decorative pots, which really add to the beauty of my plants and my home. Here are some of my favorite decorative pots for displaying my houseplants.
How To Aerate Soil In Potted Plants With Chopsticks
Chopsticks, a plastic stirrer or sturdy straw – any of these items can be used when a plant is already potted, to aerate the soil. You can use this handy household item to poke holes in the soil, near the roots, in order to gently loosen the dirt around it.
If you do this in healthy, dry soil before you water your plant, you will improve airflow to the roots and reduce the risk of waterlogging the soil when watering your plant.
Aerating A Potted Plant That is Already Overwatered
So, while it’s somewhat easy to build in some aeration when you’re freshly potting a plant, it’s a little different when you notice a plant that is already struggling with poorly aerated or overwatered soil.
First, it depends on how long the plant has been suffering and what kind of symptoms you’re seeing.
Signs Your Plant Is Overwatered
- Wilted or yellowed leaves: If your plant looks tired and unhealthy, but the soil feels wet to the touch, you can be confident it’s had too much water and root rot may have set in.
- Little blisters on leaves: These blisters are actually edema, a sure sign that your plant is absorbing more water than it can use.
- Brown leaves: Now, brown leaves can leave you wondering whether you are under or overwatering. You’ll have to put your finger into the soil to find out. If the soil is dry beneath the top layer, maybe it does need some water. But if it’s wet, the browning may be due to the stress of too much water.
- Rotten smell: If it smells like something is rotting in your plant’s soil, odds are you are right. Bacteria or fungi may be growing in there, taking advantage of a root system that is growing too weak to defend itself. If the infection has had a lot of time to progress, you may be dealing with root rot.
If you want to avoid ever overwatering your plants, check out my article all about how to know exactly when to water your houseplants.
Aerate Soil In Potted Plants To Revive Them
Except in cases where root rot has damaged soil to a point of no return, most overwatering can be remedied.
If your plant isn’t stinky and its leaves are just slightly wilted, refraining from watering for a few days and gently aerating the soil with your finger or a chopstick may be all you need to do to dry out the soil.
Repotting A Plant In Soaked Soil

If wilting leaves and a stinky smell have alerted you to the fact that your plant is drowning in its own home, it is probably time to repot.
Especially if the soil has a rotten smell, it cannot be reused. That odor is a sign that bacteria or fungi are alive and well in the dirt. If you put your plant back in it, the same problem may recur.
If you are going to reuse the same pot, wash it first:
- Remove the plant
- Gently shake all the potting soil off it
- Rinse the roots, pat them dry to remove any excess moisture
Then set the plant safely aside in a clean, empty garbage bag while you prepare its clean new home.
Soak the pot in a gentle bleach solution for 30 minutes. Rinse well and dry. Fill it with new potting soil: a nutrient-rich, fluffy soil with plenty of aerators.
Gently trim the roots of the plant, snipping any that look damaged. Carefully place the plant in its new pot and water it well just near the roots. In the days that follow, water very carefully, only as needed.
Tip: Don’t water on a schedule! Only water when the potting soil feels appropriately dry, depending on the water requirements of the plant.
Recovery Time
It may take your plant a few weeks to look its healthy self again, but in most cases, plants will recover. Taking the time to aerate soil in potted plants and provide proper drainage will keep your plants healthy and will live a much longer and healthier life!
If you found this article helpful, you might want to read some related articles that I have written.