Calathea houseplants are as beautiful as they are sensitive, and repotting a Calathea can cause a lot of problems for your plant unless you do it carefully. This article will provide a step by step guide to help you repot a Calathea and ensure it thrives after repotting.
Repot your Calathea only when rootbound and avoid disrupting the rootball unless essential. Repot in early spring, increase the pot size by only 1-2 inches (2.5-5 cm), and use a well-draining potting mix. Add fresh mix around the plant in the new pot and water lightly after repotting.
How To Repot A Calathea Houseplant
It’s difficult enough to keep the foliage of your Calathea (now officially Goeppertia) houseplant looking great, without throwing repotting into the equation.
Many people find their plant languishes, or gets loads of brown, crispy, dying leaves after repotting. There is also an increased risk of root rot. However, you can prevent all these issues by following the instructions to repot your Calathea below.
Let’s go through things step by step, to make sure that your Calathea negotiates this stressful experience without coming to harm.
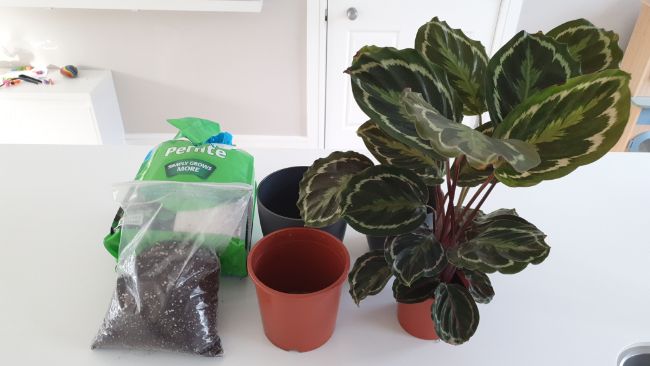
What You Will Need
- A pot that is slightly bigger than the one is currently in. Measure the diameter of the pot opening. The new pot should not usually be more than 1-2 inches (2.5-5 cm) larger than the previous pot.
- Suitable potting mix. Calatheas need a potting mix that retains some moisture, but is well-draining. A mix of 60% houseplant potting mix and 40% perlite is a great option. I’ll discuss other options later.
- A table or flat area. Repotting is a messy process, so use a surface that can be wiped clean, put down some newspaper, or use a potting tray to contain the mess.
- A small trowel or large spoon. Alternatively, you can just use your hands.
How To Repot A Calathea – Step By Step Guide
- Check your plant thoroughly to see if it is generally healthy. Calatheas are sensitive to repotting, so starting with a healthy plant is best. A few brown leaf edges or yellow leaves are fine, but if your plant is really struggling, it’s best to work out why and nurse your plant back to health before repotting.
- Organize your equipment and have all the materials you need close to hand.
- If using a plastic pot, gently squeeze the sides of the pot to loosen the soil from the sides of the pot. Check the base of the pot to see if any roots are growing through the drainage holes. Loosen these up as needed to make it easier to remove the plant from the pot.
- Carefully turn the plant and pot on its side. Ease the plant out of the pot, taking care not to damage the foliage. It is sometimes helpful to hold the pot upside down, placing one hand over the soil to support the plant, and use your other hand to turn the pot upside down and gently pull on the pot.
- If you’re struggling to remove your Calathea from the pot, you can further loosen the soil by carefully inserting a knife down the inside of the pot and gently running this around the inside of the pot.
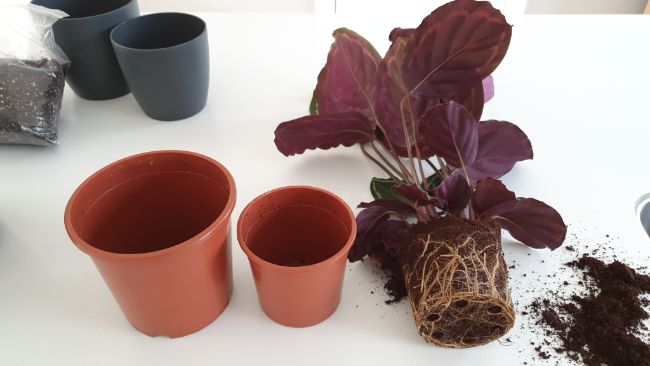
- Once the plant has been removed from the pot, inspect the visible roots that you can see. These should be light brown/white and feel quite firm and spongey. What you don’t want to see are roots that are smelly, black, fragile, and soggy, as this indicates root rot.
- There is no need to loosen the soil or roots, even if they look quite rootbound. The more the roots are manipulated, the longer it will take them and the plant to recover after repotting. It also increases the risk of transplant shock. Once in the new pot, the roots will slowly grow into the new soil.
Repotting Your Calathea
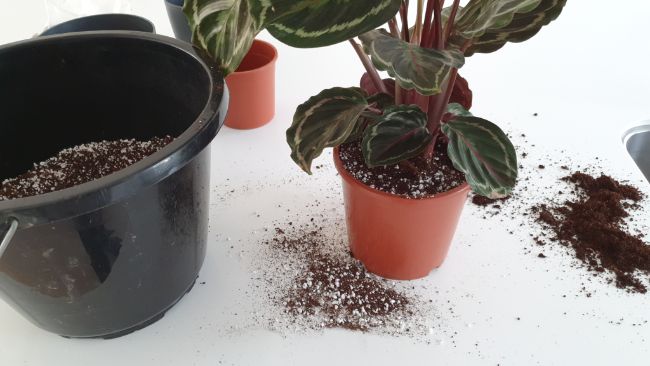
- With the new pot in front of you, add 1-2 inches (2.5-5 cm) of new potting mix to the pot. Next, place the plant on top of this new soil and test the level of the plant. The idea is to have the level of the soil come up to about 0.5-1 inches (1.25-2.5 cm) from the top of the pot.
- Holding the plant in the center of the pot, add fresh soil around the plant using your hands or a trowel, filling the pot with soil. Gently firm the soil around the plant, but don’t compact it too much.
- Once the plant is sitting snug in its new home, you can add a little water. Bear in mind that the roots of your new plant may not work as well for a few weeks due to the shock of repotting. Just add enough water to make the soil lightly moist.
- Place your plant in moderate heat and lighting. Extremes of either will cause more stress for your plant. Try to increase humidity as much as possible, as this will reduce the risk of foliage problems in the weeks after repotting. I generally like humidity levels to be above 60% for my Calatheas.
- Avoid fertilizing your Calathea after repotting for at least 4-6 weeks. A sudden influx of fertilizer can cause root damage and actually make it harder for your plant to reestablish itself after repotting.
- You should not expect any new growth for at least 4-6 weeks from your Calathea, as it adjusts to its new home. Hopefully after this, with more space and fresh soil, your plant will spring into life and produce plenty of new foliage.
When To Repot A Calathea
The best time to repot a Calathea is in early spring, although you can repot at any time of year, as long as you provide good conditions after repotting.
Most Calatheas take a while to adjust after repotting. Some plants can show some signs of stress on their foliage, such as brown leaf edges, or yellowing of lower leaves.
By repotting in spring, your plant is entering a rapid growth phase, so after an adjustment period, it should produce lots of healthy growth throughout the growing season. You can then prune off any damaged or aesthetically unpleasant foliage, helping your plant get back to its best very quickly.
Why Shouldn’t you Increase the Pot Size Too Much When Repotting A Calathea?
Calatheas are quite prone to root rot, and the amount of soil in a pot, relative to the size of the plant is a major risk factor for overwatering and root rot. If you put your Calathea in a much bigger pot, the soil will stay soggy for a long time after watering.
Why Are Calatheas At Risk Of Overwatering After Repotting?
There are several factors that increase the risk of overwatering and root rot after you repot a Calathea.
- The roots of your Calathea typically don’t function as well for a few weeks after repotting, reducing the ability of the plant to take up water.
- The increased quantity of soil takes longer to dry out, producing prolonged, soggy conditions around the roots.
- The roots have not yet grown into the new soil, so this further increases the time the soil stays soggy.
All these factors leave the roots sitting in soggy, poorly aerated soil, which increases the risk of root rot.
The best way to prevent this is to avoid increasing the pot size too much when repotting, take care not to manipulate the roots excessively, and water your Calathea lightly after repotting. Check your plant every few days and just keep the soil lightly moist.
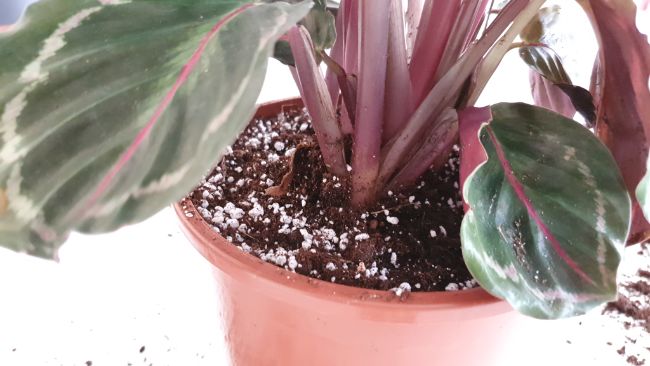
Although I repotted this plant n a plastic pot, terracotta pots are sometimes a good option as they are porous, and the soil will dry out quicker, reducing the risk of overwatering. You can read about the pros and cons of different pot materials in this article.
Calathea Repotting Shock
If your Calathea wilts spectacularly within 1-2 days after repotting, this is a sign of transplant shock. This is due to the roots ceasing to function due to the stress of the repotting experience.
Transplant shock often leads to plant death and is the main reason why repotting Calatheas must be done carefully. Providing high humidity, moderate lighting, and ensuring the soil is only slightly moist is the best way to support your plant’s recovery.
If your plant does recover from transplant shock, it is likely that many of the leaves will develop signs of damage such as brown edges or spots, or you may see some yellowing of lower leaves.
If your plant picks up, just have patience and provide the best care you can. After a while, it will produce new, healthy leaves, and you can then prune off the damaged leaves as you desire.
What Soil To Use When Repotting A Calathea
As shown in this example, my Calathea was potted in pure peat moss when I bought it from the store. Peat is great at retaining moisture, and does drain fairly well initially. However, after a while it gets too compacted, leading to soggy soil that drains poorly, leaving the roots vulnerable to root rot.
Most off the shelf potting mixed are formulated for water retention, and often don’t drain sufficiently well for a lot of houseplants. If you are using a regular houseplant potting mix, simply add perlite, pumice or gravel to the potting mix to improve drainage and aeration.
The ideal soil mix contains a combination of organic material and inorganic drainage amendments. Here are a few good suggestions:
- I like to use a mix of 50% peat or coco coir, 40% perlite, and 10% compost for my Calatheas. Coco coir is preferable as it is more sustainable.
- A mix of 60% houseplant potting mix and 40% perlite is a good option.
- 10% worm castings, 25% perlite, 35% coconut coir, 25% orchid bark, 5% Charcoal is a terrific mix, providing excellent moisture retention, drainage, and nutrients.
- You can also purchase specialist Calathea potting mixes from Etsy (Link to Etsy). These can be really handy if you want to provide a perfect environment for your plants, but you’d rather not make your own.
If you’d like to learn more about making or choosing potting mixes for your houseplants, you can read my article that covers everything you need to know.
Do Calatheas Like To Be Rootbound
Calatheas do not like to be rootbound and will grow best when they have space to grow and thrive. Keeping them in a pot that is too small will restrict their growth.
Many people believe that they prefer being rootbound because they often struggle for a while after being repotted. It is also more common to have problems related to overwatering when your plant is in a pot that is large relative to the size of the plant.
You should repot your Calathea once it is showing signs of becoming significantly rootbound, but take care during and after repotting to prevent problems.
Why Does My Calathea Have Nodules Or Bulbs On The Roots?
When you repot your Calathea, you may notice swollen nodules on the roots. These swollen nodules are actually rhizomes, and are a type of specialized stem. New roots and leaves grow from these rhizomes. If you see plenty of healthy swollen rhizomes when you repot your Calathea, it is a sign of a healthy plant.
Related Articles
I’ve written loads of other articles about all aspects of Calathea care. If you’re having any problems with your Calatheas, or just want to learn how to keep them in perfect condition, have a look at some of the articles listed below.
- 12 stunning Calatheas you will love
- Why are the leaves of my Calathea curling?
- How to prevent and fix yellow leaves on Calatheas
- How to care for Calathea ornata
- How to care for Calathea crocata
- Peacock plant care – How to care for Calathea makoyana
- How to care for Calathea orbifolia
- How to care for Calathea zebrina
- How to care for Calathea warscewiczii (Calathea Jungle Velvet)
- How to propagate Calatheas
- How to care for Calathea roseopicta
- How to care for Calathea musaica