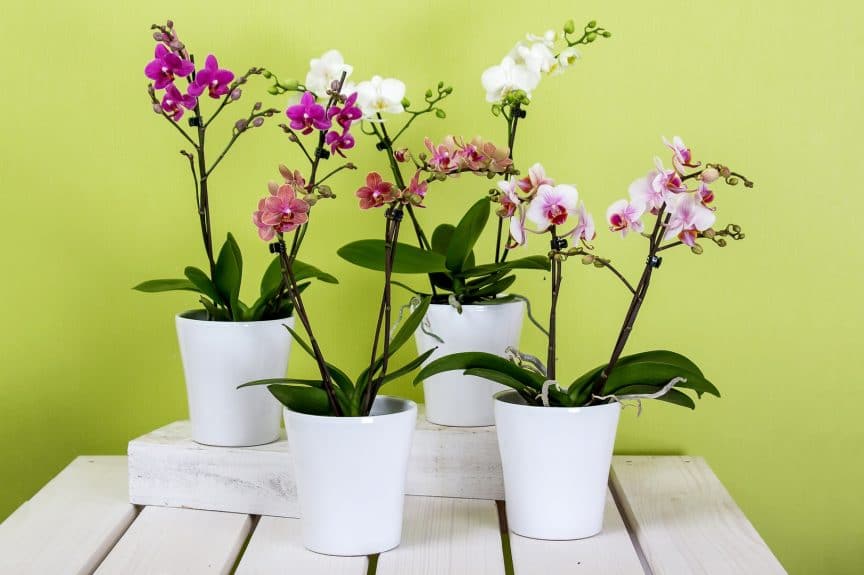
To help ensure that their lovely blooms grace your home as often as possible, it’s important to learn how to repot phalaenopsis orchids, which you may know as a moth orchid, as this will need to be done every few years. As these orchids obtain much of their moisture and nutrients directly from the air, special care for their unusual root systems is required while you are repotting it.
In this step-by-step guide, I’ll explain how to repot phalaenopsis orchids by walking you through the key elements for successful orchid transplanting. You will learn how to promote more flowering by making sure your plant’s roots have what they need to grow healthy and strong. For more information about caring for phalaenopsis orchids, read my article here.
How To Repot Phalaenopsis Orchids: The Basics
Before getting into the details, here is a brief summary of what you need to know about how to repot phalaenopsis orchids.
- Phalaenopsis orchids should be repotted about every two years or so. The best time to do this is after the orchid has finished flowering, ideally shortly after new air roots emerge.
- Choose a pot for your orchid that’s transparent, has plenty of holes, and is not too big for a root system that prefers to be tightly packed.
- For the potting mix, use growing media that will provide good aeration and rapid drainage. See here for more info.
- To remove roots from a pot, soak them before gently easing them out of their container.
- Next, carefully remove all of the old growing mixture.
- Assess the roots and remove any that are damaged or unhealthy prior to repotting.
- To repot your orchid, hold the plant in place in the pot and spread the roots out a little before putting in the potting mix and carefully pressing it in.
Now that we’ve gone over the basics, let’s take a closer look at each of these issues, answering some of the questions you’ll have if you are a beginner learning how to care for potted phalaenopsis orchids.
How Often Should I Repot An Orchid?
As a general rule, phalaenopsis orchids need to be repotted every few years. However, since sudden changes are stressful for the plant, you should learn to recognize when it’s time to repot your orchid rather than repotting a plant that doesn’t need it.
The main reason why phalaenopsis orchids will need to be repotted is that the potting mixture is beginning to break down and decompose. This condition will starve the roots of air and nutrients, as well as retaining too much moisture, which will lead to root rot and disease. You should therefore check the texture of the potting mixture periodically, keeping an eye out for the first signs of breakdown, compaction, or excess moisture.
Another main reason a phalaenopsis orchid may need repotting is because the roots are rotting due to too much moisture. This could be related to the breakdown of the growing medium, as just mentioned. But it could also be due to overwatering, inadequate airflow around the roots, lack of drainage, or some combination of these factors. Whatever the cause, this situation is very dangerous for the plant, so you should immediately repot your orchid, making sure to remove the damaged roots and to use fresh potting mixture that will provide more aeration and dryness.
The other reason your orchid may need repotting is that it has outgrown its pot, although it’s more likely that the potting mix will become degraded before the roots of a phalaenopsis have become too tightly tangled. The roots of these plants actually prefer to be tightly packed and should fairly thoroughly fill the growing medium. So don’t take somewhat tangled and overlapping roots to be a sign that the plant needs a larger pot. Likewise, roots growing up out of the potting mixture are also normal. These are called air roots and are not a sign that the plant needs repotting.
When Is The Best Time To Repot A Phalaenopsis Orchid?
So, once you’ve decided that you should repot your orchid, the next step is to determine the right time to do it.
You should never repot a plant that is blooming, as this stresses the plant – this goes for orchids as well as any other type of plant.
The best time to repot a phalaenopsis orchid is when new air roots begin emerging but after the plant has finished flowering. This is because orchids become acclimated to a new environment by growing a new set of roots. Thus, repotting when new air roots start growing will promote a faster acclimation period and allow the plant to get to the next flowering stage more quickly.
But as excited as you may be to see new air roots sprout, it’s best to wait until the little fellas are about half an inch (1.2 cm) long to repot an orchid, being very careful about breaking or damaging these new roots, as they won’t grow back. However, if you wait a little longer until they are at least 4 inches (about 10 cm) long, they will simply branch where broken and continue to grow.
Additionally, if new root growth occurs while your orchid is flowering, you should wait until all the flowers have died off, when the plant will turn its focus and energy from blooming to vegetative growth.
What Are The Best Pots For Growing Orchids?
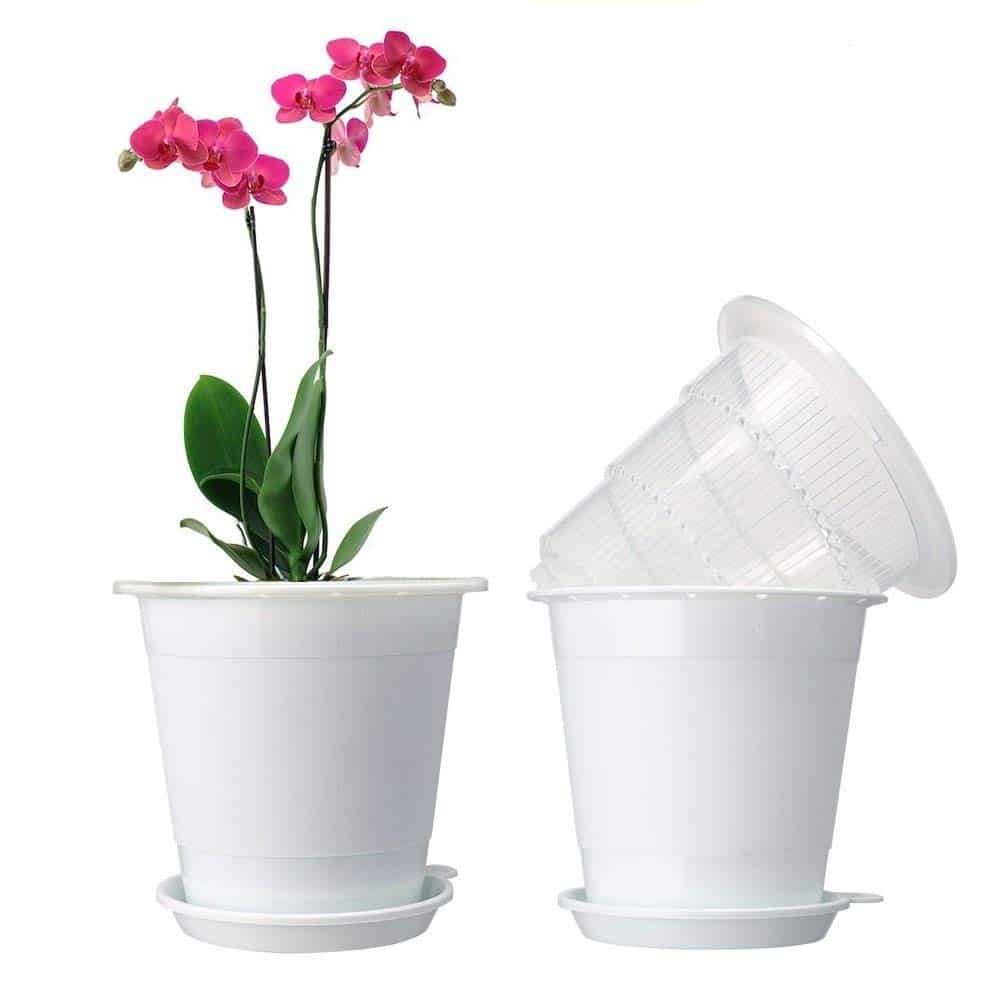
Clear pots are a great choice for growing orchids because they allow you to monitor the health of the all-important roots.
However, there’s another, more interesting reason why phalaenopsis orchids are best grown in transparent pots: Their roots photosynthesize when exposed to light. By allowing light to penetrate the pot, you are providing the plant with an important element of the growing environment that it’s accustomed to in nature. These intriguing roots seek light, so the plant is able to focus its energy on healthy growth and generating blooms when you give the roots access to light.
A pot that has plenty of holes for drainage and ventilation will also help make the roots of the phalaenopsis orchid happy and healthy.
Now, exposed roots in a plastic container is not the most aesthetically pleasing look, so it can be difficult to resist placing the plant in its transparent pot inside an opaque pot in your home, which negates the advantage of providing light to the roots. A good compromise is to place your orchid in a decorative pot when you want to display its gorgeous flowers, but once it’s finished flowering, move it to a grow room or other more private location, where you can leave the roots exposed for the vegetative growth stage.
What Size Pot Should I Use For An Orchid?
As mentioned previously, phalaenopsis roots prefer to be somewhat tight in their pot and should fairly thoroughly fill the potting mix. So when you repot a phalaenopsis orchid, choose a pot that’s only slightly larger (by about an inch or so) than the one the plant is currently in. If you place your orchid in a pot that provides more room for growth, the roots will work to fill it, spending the plant’s energy on this task rather than on producing new growth, which will delay blooming.
Also, it takes longer for water to drain from a larger pot, leaving the media at the center of the pot to remain moist longer, which will damage the health of the roots. So when in doubt, choose a pot that may be too small over one that’s more than a little larger than the current pot.
What Potting Mix Is Best For Orchids?
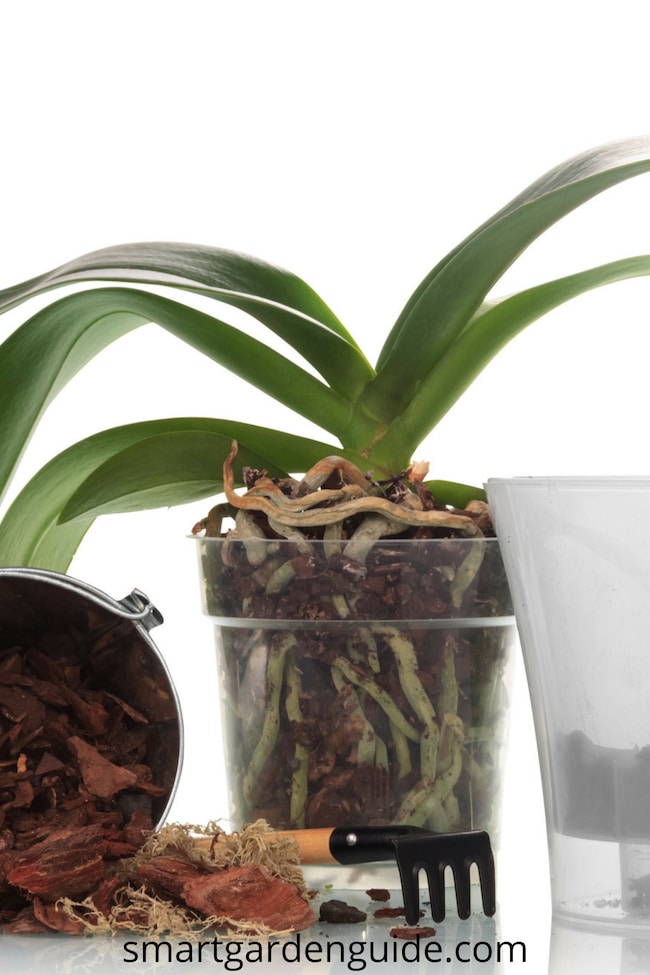
Since the roots of phalaenopsis orchids are accustomed to being exposed to the open air, regular potting compost or soil shouldn’t be used as a potting mix for them. These orchids need more aeration and drainage than those media provide.
Tree bark is a great choice because that’s whatmost orchids have in nature. Clay pellets, pumice pebbles, perlite, coconut coir chips, andsphagnum moss also make excellent choices, used either alone or in a blend.
Courser media will dry more quickly and provide more aeration, making them useful for growing orchids in humid climates, whereas you should use finer media that hold more moisture and dry more slowly if you live in a dryer climate.
What Is The Best Way To Remove An Orchid From Its Pot?
Since one of the main functions of orchid roots is to attach the plant to a substrate, removing them from a pot can be tricky. Thus, soaking them in water for 5 minutes before gently easing them out will make them more pliable. Even then, you may have to break the pot or cut it away, if the roots prove to be too tenacious.
Why Do I Need To Remove All Of The Old Potting Mixture Before Repotting An Orchid?
You should always use fresh, new potting mixture and be sure to remove all of the old mixture clinging to the roots when you repot phalaenopsis orchids. The purpose of this is to prevent the spread of disease that may be lurking in the stale old growing medium, which will have begun to break down and decompose, as discussed previously. Rinse the roots with tepid water to make sure that none of the old potting mix remains.
Should I Trim The Roots Of A Phalaenopsis Orchid?
The next step in the phalaenopsis orchid repotting process is to assess the roots and remove any that are damaged or unhealthy. But if you are new to the world of orchids, you probably have questions such as, which roots should I trim, what do I do with the air roots, and how do I tell if the roots are healthy?
Well, those air roots you see growing up out of the potting mixture are quite normal and are useful for determining when to water your orchid. Therefore, you should leave them be, as long as they are healthy. Healthy phalaenopsis roots, whether growing inside or outside the pot, will be thick, firm, and white with lime green tips when dry but will quickly turn all green when watered.
On the other hand, if your orchid’s roots appear black or brown in color and feel mushy or slimy, it means they are suffering from too much moisture, which may mean you are overwatering them or that it’s time to repot your orchid in fresh potting mix. Meanwhile, with paleness, gray color, and a dry appearance indicating dehydration, many orchid growers monitor their orchid’s aerial roots for the beginning of these signs before watering, since overwatering is usually more problematic than too little watering.
So, whenever you find roots that are damaged or unhealthy, you should remove them using a sharp, clean (preferably sterilized) blade or pair of pruning shears. You’ll be doing your orchid a big favor by removing the unhealthy roots and allowing them to turn their energy toward more productive growth.
What Is The Correct Way To Plant A Phalaenopsis Orchid In A Pot?
The final step in the repotting process is to transplant your phalaenopsis into its new pot, paying meticulous attention to details.
First, hold your orchid in the location you want it to be planted and gently spread the roots out a little bit. Since the phalaenopsis is a monopodial orchid, meaning it has a single stem, it should be positioned in the center of the pot. Also, make sure the base of the stem is about level with the top of the container to ensure that the greenery and aerial roots will remain out of the growing medium and exposed to the air.
Now, gently add the new potting mixture, being careful to help fill in all the spaces between the roots. A chopstick works well to poke the medium in. While you don’t want large air pockets in the medium, you also don’t want to tamp the potting mixture in so much that it becomes too compacted. And try not to tap the pot too much to avoid having the finer particles fall through to the bottom, which will retain water right where it takes the longest time to dry out. Filling the container with medium up to half an inch (1.2 cm) or less from the top of the container will encourage roots to grow into the medium and make watering easier.
Finally, let the plant rest for a day or two before watering, and then watch your orchid flourish, knowing that you’ve provided its unique root system with everything it needs to begin adjusting to its new home.